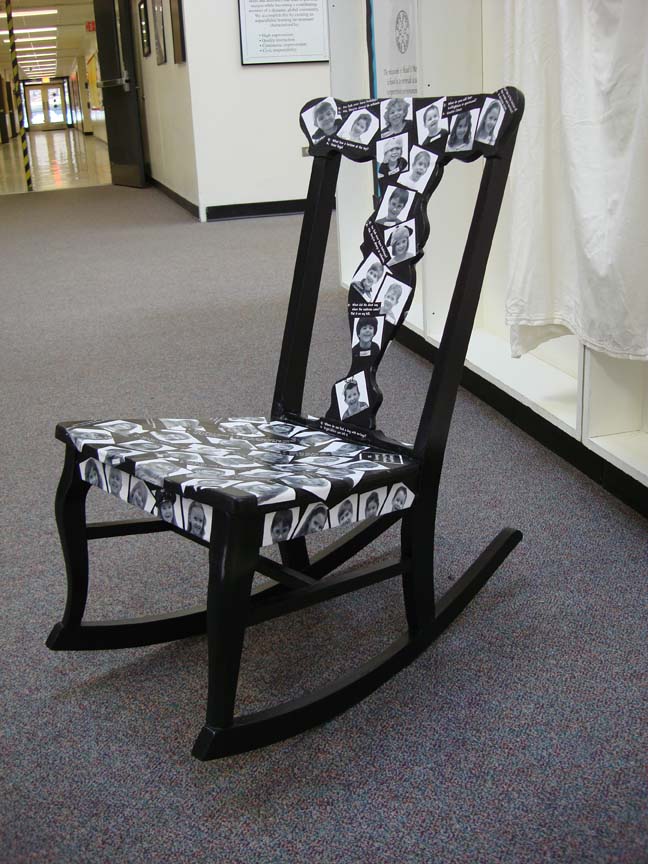
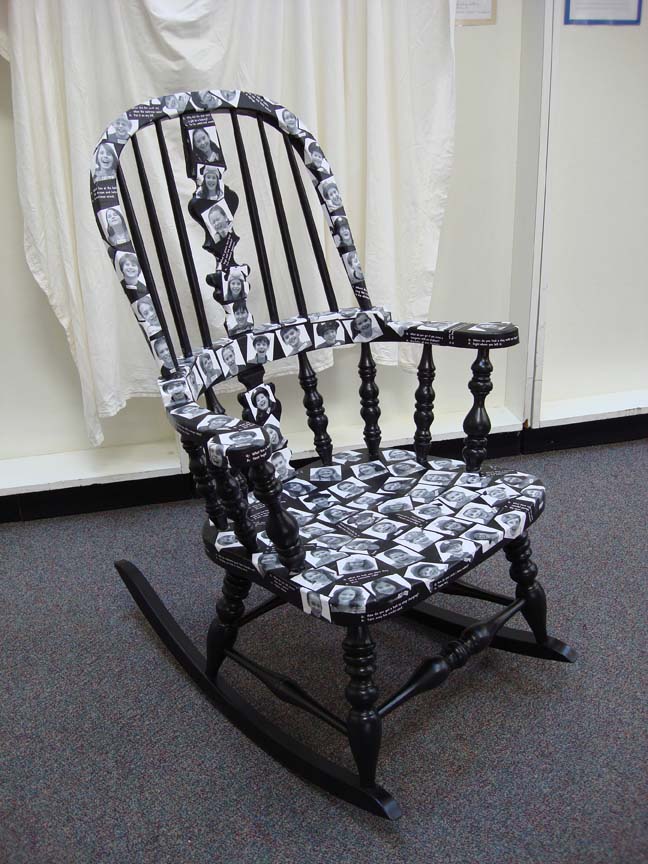
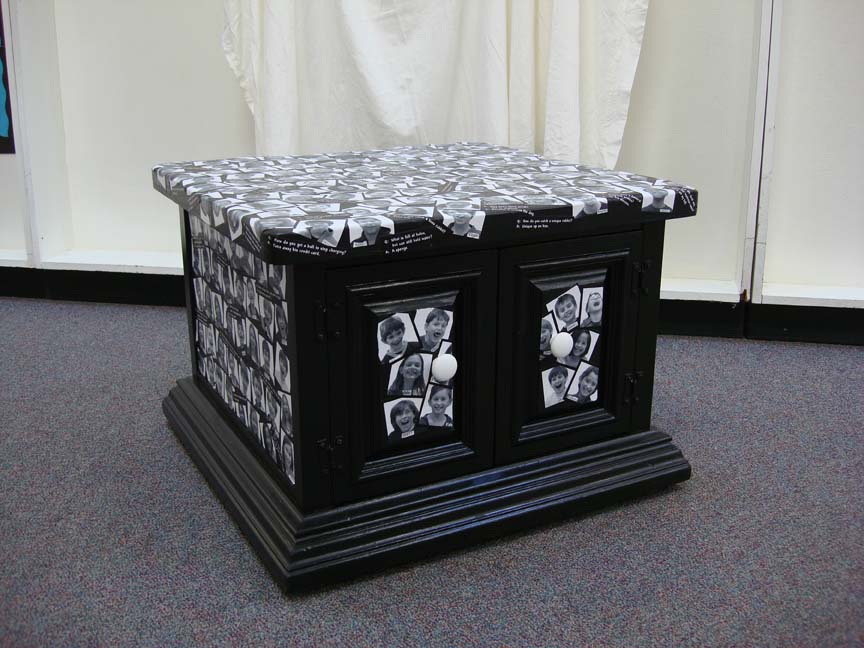
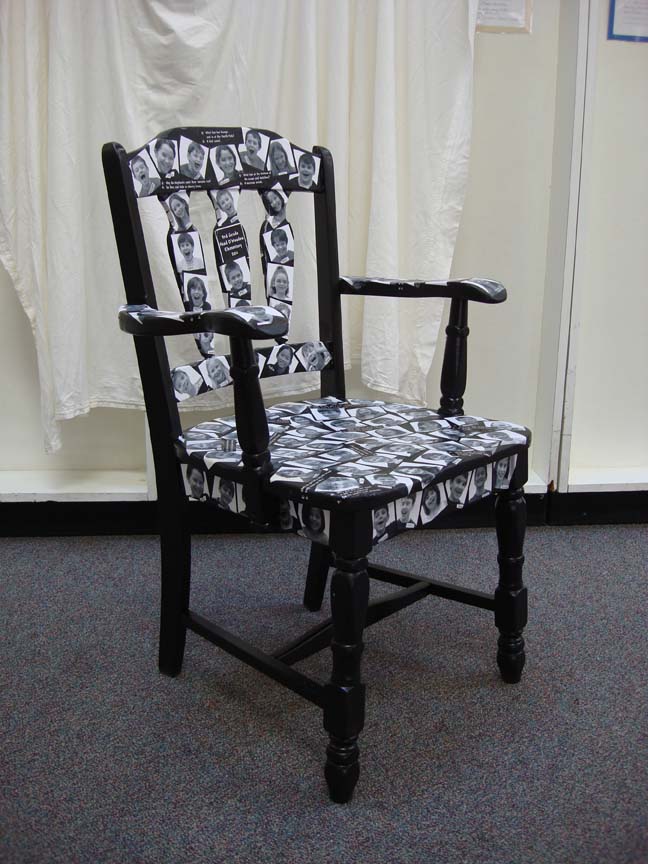
What has 118 ears, many missing teeth, and tells silly jokes? A Laughing Chair!
This is a great project for anyone who loves photos of family and friends. Rescued from certain death in a landfill, these tables and chairs were lovingly brought back to life as truly unique pieces of art. Whether in a playroom, child’s room, kitchen or odd space, the lasting charm of these pieces is that, when you’re sad, they are there to cheer you up:)
A Whole-School PTA Project: While you would be left more sane if you did one of these one-of-a-kind pieces, I will describe here the considerations I had for taking on a whole school PTA “class project” fundraising event. The trick is to come up with a piece of art that 400 children can work on, and that the parents will want to bid hundreds or even thousands of dollars for at the annual fundraising event. And you have to work with the teachers and staff and parents and kids on the logistics of the project, all under tight time and budget constraints. Not the easiest nut to crack. But everything went according to plan, and everyone seemed delighted with the end results.
Also keep in mind that it’s not just about the money to be raised. A project like this is a school spirit morale booster, an opportunity for parents to be involved, kids to be involved, and everyone to admire their work and make a big splash both at the event and at school before the pieces go away to be auctioned off.
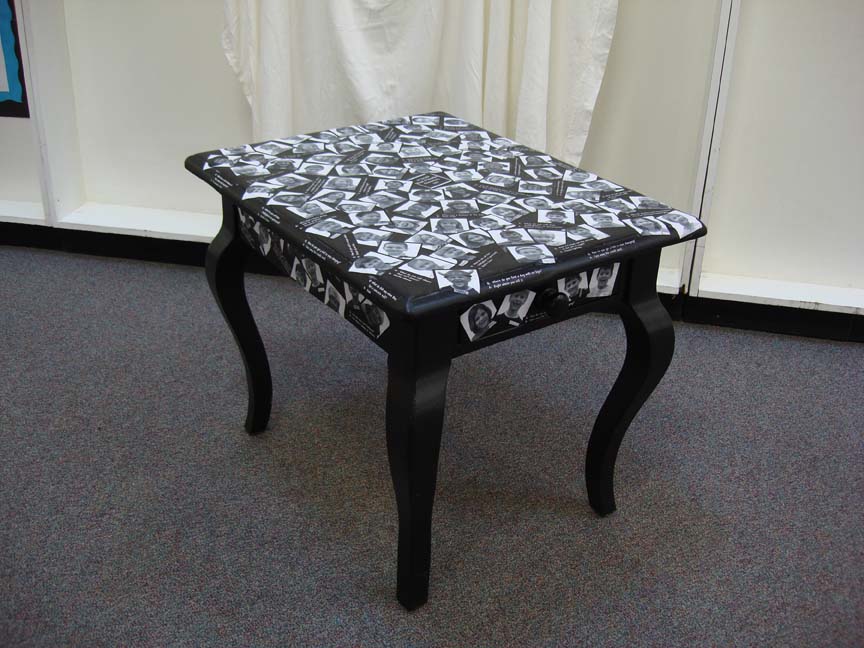
The Place to Start–Goodwill or other charity shop. It’s not at all hard to find funky but sturdy tables and chairs (and shelves, mirrors, small chests of drawers, etc. etc.) that are just begging to be taken home and refurbished into an heirloom. The funkier, the better, within reason. Scratched up surfaces are no problem, it’ll all be covered up. One day I got lucky and found all five tables at one shop for $5 each–a grand total of $25 and I had half my raw materials! I found the five chairs at 3 other shops, and they fit nicely in the back of my minivan. I dropped them off at the school because the Volunteer Moms would work on them there.
What Else to Buy:
From the craft store, good ol’ Mod Podge, about one jar per two pieces of furniture. Foam brushes.
From the paint store: A gallon of black latex paint, satin finish. Cheap 1″ paint brushes. Sand paper, medium grit.
From the office supply store: A pack of photo-quality inkjet printing paper, matte not gloss, thin paper not heavyweight. Extra ink for your printer.
Although you could use any color scheme you like, we went with black because the photos would be black & white, with a black frame and white background, black with white type for the labels and jokes, and the black base of the furniture color would tie it all together and hide all the “negative” spaces.
Volunteer Moms: Email your list of Volunteer Moms to come in during and after school to prep the furniture. It should be washed and given a quick sanding, not to make the surfaces smooth, but to make them rough. If you’re covering an old surface that was once polyurethaned to a shiny gloss, you now want your coat of paint to stick to that surface, so the sanding gives it a texture to adhere to. After sanding, wipe them down again with a damp cloth to remove dust. Then paint them black, probably two coats, and it should dry within an hour or so.
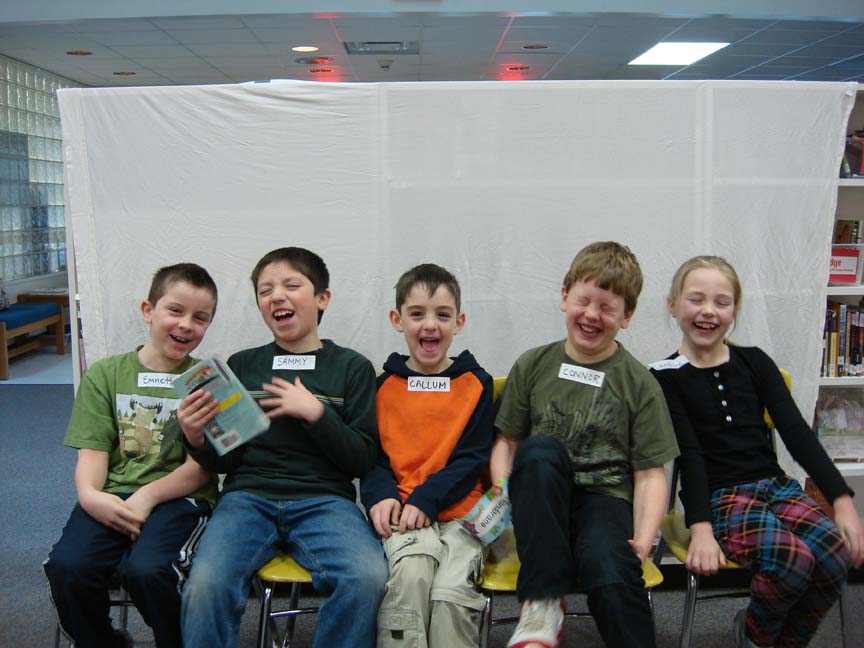
Meanwhile, Photograph the Kids: Our school organized this quick but fun participation by the kids during each class’s library period, but it can be coordinated with an art class, recess, whatever kind and generous teacher offers their space and time for a whole week. We photographed the kids in groups of five or six, lining them up in front of a white background which made it easier to Photoshop their head and shoulders out of the background. We also wrote each kid’s first name only in black marker on a white piece of tape and stuck it on their clavicles (between the base of their neck and their shoulder. It can be up high because you’re going to be cropping the heads in tight). This was so that, years down the road, an old photograph of a familiar face would have a name attached to it. We sat them in chairs and told them their job was to laugh at our funny jokes. They complied readily, and as they laughed, I shot 5 or 6 photos of each group. This worked out well because when going through each group, I had 6 shots of each kid to choose from. Also tape a paper up in the background of the photo with the teacher’s name on it so you can keep track of whose class or which grade that face belongs to. As you can see, we used only the ambient light in the room, no fancy lighting.
Oopsy! I made the mistake of getting some silly hats at a party store for the kids to wear. They loved the hats of course and had fun trying them all on. However, it was pointed out to me by an alert staff member, that kids sharing hats in an elementary school is not a good idea because of the possibility, and not a faint one, of lice being transmitted. So skip the hats.
Funny Jokes: I looked through some silly joke books and found about 20 of the best ones. The kids’ overall favorite: “What do you call cheese that doesn’t belong to you?……Nacho Cheese.” Other goodies: “Where does a general keep his armies?…..Up his sleevies.” “Where do you find a dog with one leg?…..Right where you left him.” “What has two humps and lives at the north pole?…..A lost camel.” “What do you get when you cross a kangaroo and an elephant?……Big holes all over Australia.” Find your own good ones, and try NOT to have fun doing that!
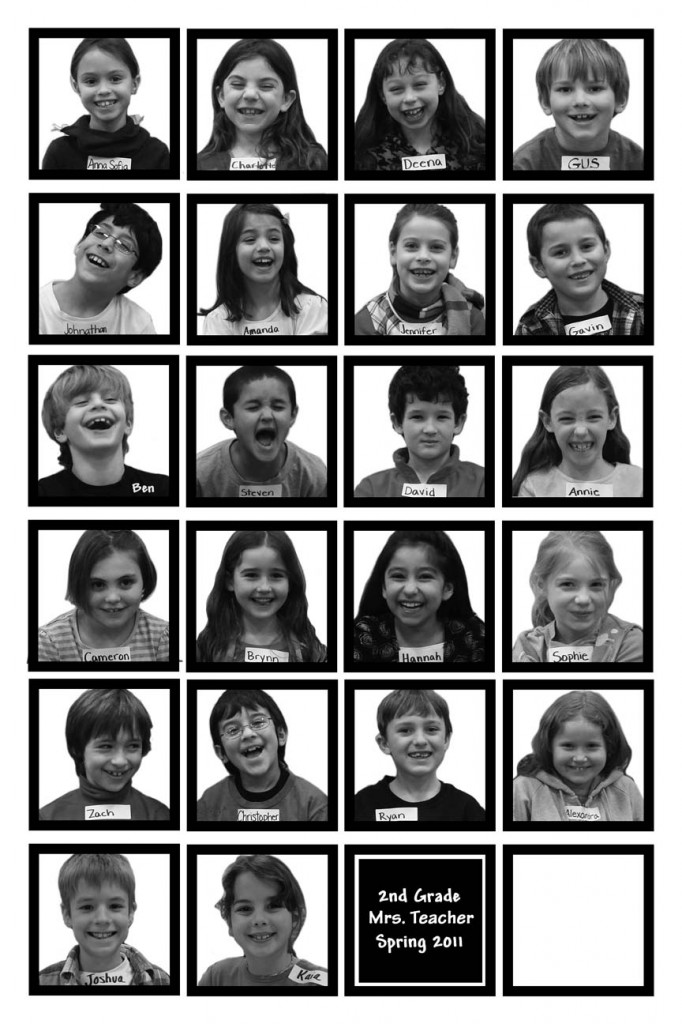 Find a Volunteer Parent Who’s Good at Photoshop: Once you have all the photographs in the can and downloaded into your computer, make a frame template into which each class’s photos will be placed. I made my frame squares 2.5 inches and had 24 squares per page, (on a 13″ x 19″ sheet), enough for one classroom per printed sheet. One at a time, I selected the best laughing face of each child, cut and pasted it into a square, erased the background out to white, turned the mode to Grayscale, and adjusted the brightness and contrast. I cropped them in tightly, often chopping off much of the tops of their hair, to get those big smiling faces as large as possible. In the cases where their name-tape wasn’t visible, I just typed in their name in the white space or in another corner. On each sheet I made a label with the grade, the teacher, and the date. This not only kept the printed sheets organized, but the label was also cut out and used on the furniture as well.
A Note About Ink: Even though the mode was Grayscale, the printer gives you an option of printing with black ink only or with colored inks. I used the color ink setting because I noticed the quality of the skin came out better, for some reason.
Also, when spreading the Mod Podge over the photos, if the brushwork was overworked, every once in awhile it would slightly smear the ink, which freaks you out at the time because you think you’re ruining the piece. It didn’t prove to be a big deal, but just keep an eye out for that happening.
Will inkjet printer ink hold up over the long run? I don’t know, and anyone I tried calling about it didn’t know either. It’s important, after all, if a family pays big bucks for this piece it would not be good for the photos to fade after a couple of years. The only thing I can report is that my prototype still looks great after two years, but I wouldn’t leave it sitting in a sunny window.
Numbers: This is to help you figure out how many of each kids’ pictures to print out for a given piece of furniture. You would think that pasting 90 photos on a chair would cover that chair very quickly. But you’d be surprised at how much space you have left. We did five tables and five chairs, one table and one chair for each GRADE. There were approximately 90 kids in each grade. We printed out 4 sheets of each grade. So each kid appeared on a table twice and a chair twice.
Don’t Forget the Jokes: Typeset the jokes onto a sheet and print out several, to be included in and around the laughing faces. Cute!
Email the Volunteer Moms Again: Once all the photographs are printed out onto photo quality inkjet paper, it’s time to have a cutting and Mod-Podging party. A group of chatting Moms with scissors will tear through this job in no time. Just keep each class’s (or grade’s) cut photos in marked ziplock bags so they don’t get in the wrong group. Lay out all the photos on the main table or chair surface to get an idea of how much ground they will cover. You may want to leave sides, legs, etc. uncovered, just plain black. You may want to orient the faces in a pattern, with the class label in the center. You may want to temporarily stick the photos in place with a tiny yellow sticky note or a tiny smidgen of Mod Podge if you want to be very sure of your layout before committing. Once you’re happy with the positioning of the photos, simply use the Mod Podge like glue and, using the foam brushes, apply it to the backs of the photos and stick in place. Wrap the photos around the non-flat parts of the furniture, with a scissors or X-acto knife close at hand to snip down the center of any bubbles or puckers. Then overlap to make a “dart”. After they’re all stuck down, apply a second, medium-heavy coat of Mod Podge over the top of everything. Make an all-over, brushy swirl pattern as you go.
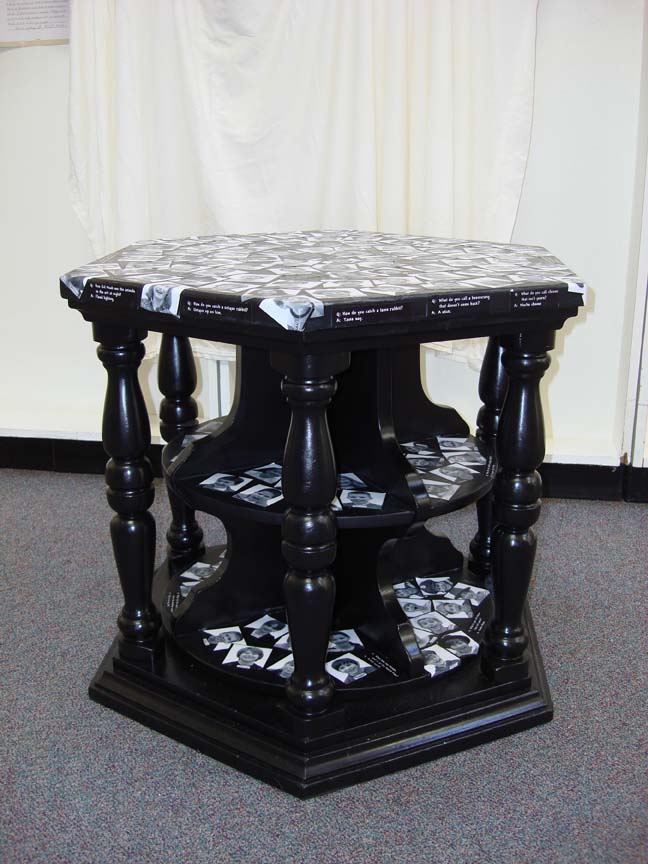
I wish I could find the “before” photos of these tables, because, sitting in the Goodwill shop, it was furniture only a mother could love, if you know what I mean.
Was It Worth It? On auction night, the ten pieces of furniture went for a total of $2,375.00 This was an average of $240 each, with two of the pieces going for over $500. Not bad for the initial outlay of less than $100 for the furniture and probably another $100 for paper, ink, latex paint and Mod Podge.
