Looking for a class project that the kids will love working on and the parents will bid big bucks for at the PTA auction??
This is it!!
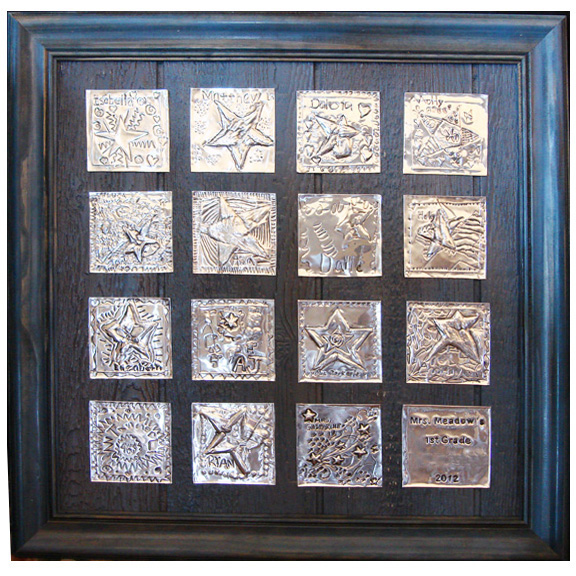
These tin/copper engravings came out absolutely charming, and you wouldn’t believe the variety of images and the quality of workmanship achieved by elementary school kids! The idea for these came from my partner in the project, “L”, a veteran art teacher who had experience with these little craft foil sheets. This is the magic that made the whole project possible: they are so easy to work with, that even kindergarteners can trace an image onto them and work them into embossings that look as though they were crafted with a hammer and anvil. All during one art class! (The childrens’ participation, that is–the grownups’ time and energy investment is considerably more.)
I’m writing about this with all the considerations of a school-wide project because that’s where the learning curve was for me. But you, fun-art-project lover, may extrapolate the materials and techniques down to a manageable size.
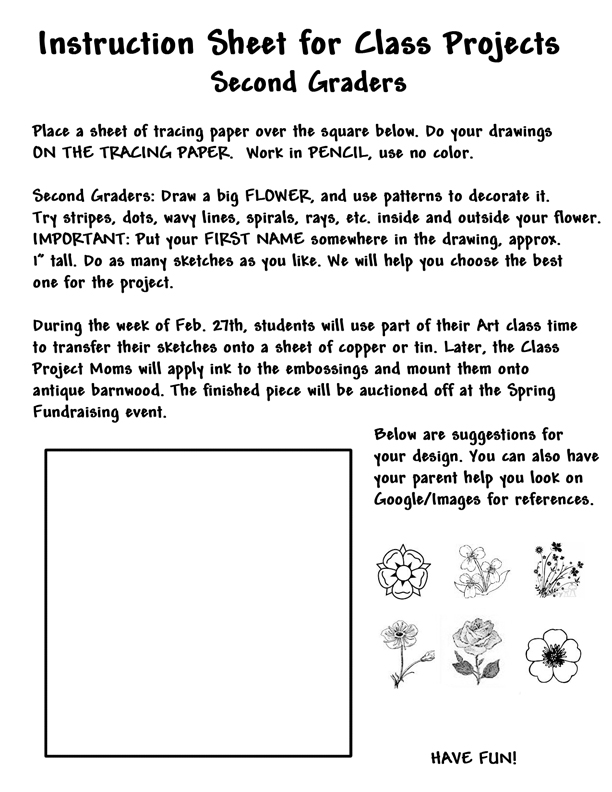
Where to start: We designed, copied and sent home this Instruction Sheet, along with a couple sheets of tracing paper, in backpack mail so the kids could work on their sketches at home and come to art class prepared with their images. We gave each group a theme, like hearts, stars, flowers, leaves, and patterns, so that the finished piece would be cohesive, but encouraged individuality within the theme.
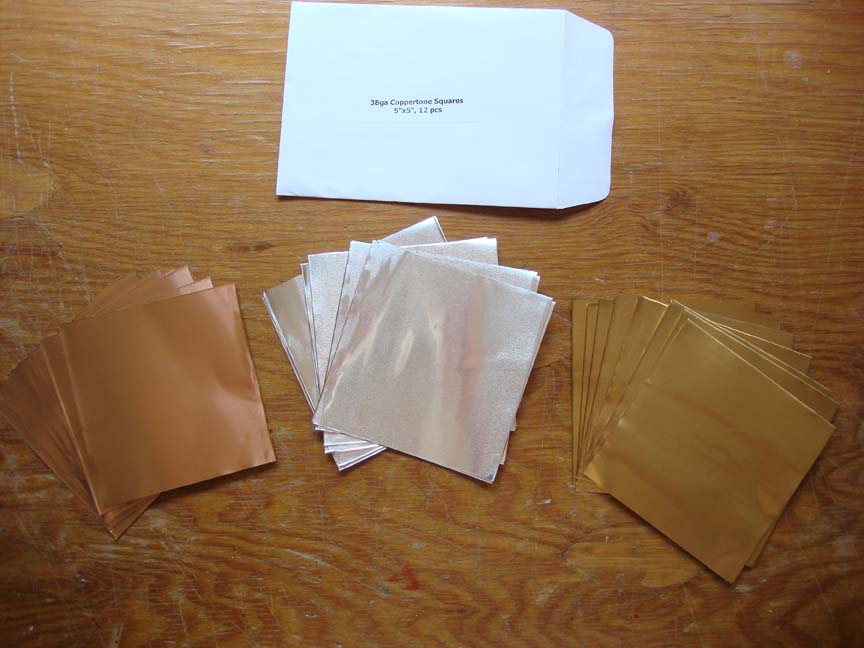
These are the 5″ x 5″ coppertone, tin, and goldtone sheets that are available online from Sax Arts and Crafts, or possibly other art supply stores. They’re actually all made of foil, about the thickness of two aluminum foil sheets, with the “coppertone” and “goldtone” color printed on one side. The back sides are all silver.
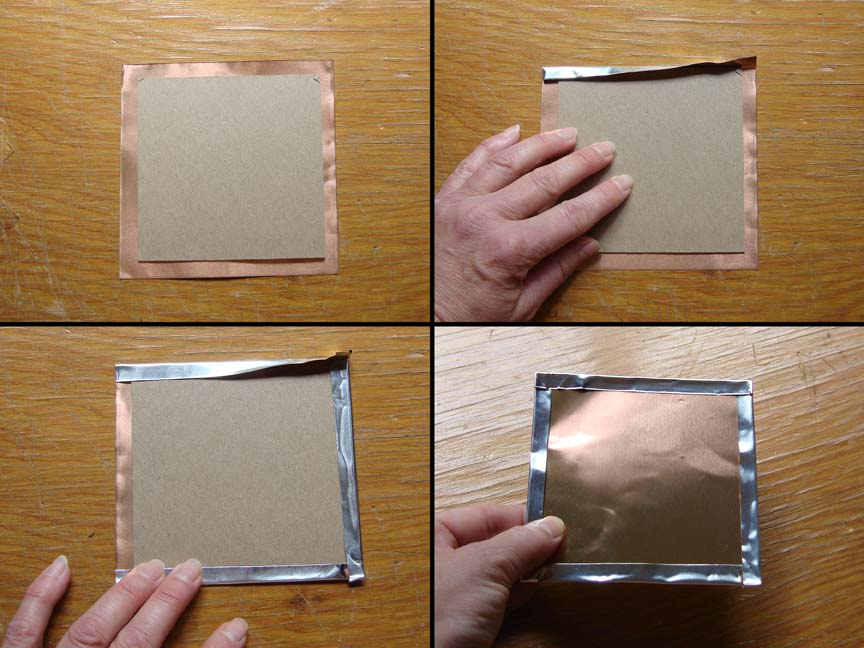
Before the classes met, we folded the edges of each tin, using a cardboard cutout as a template. This made them sturdier, and gave them a nice slightly-crumpled 3-D edge. On some pieces, we used the side with the tin frame showing. Keep in mind that doing this reduces the size of the tin, and of the sketches, to 4.5″ x 4.5″. This becomes important when measuring up the boards.
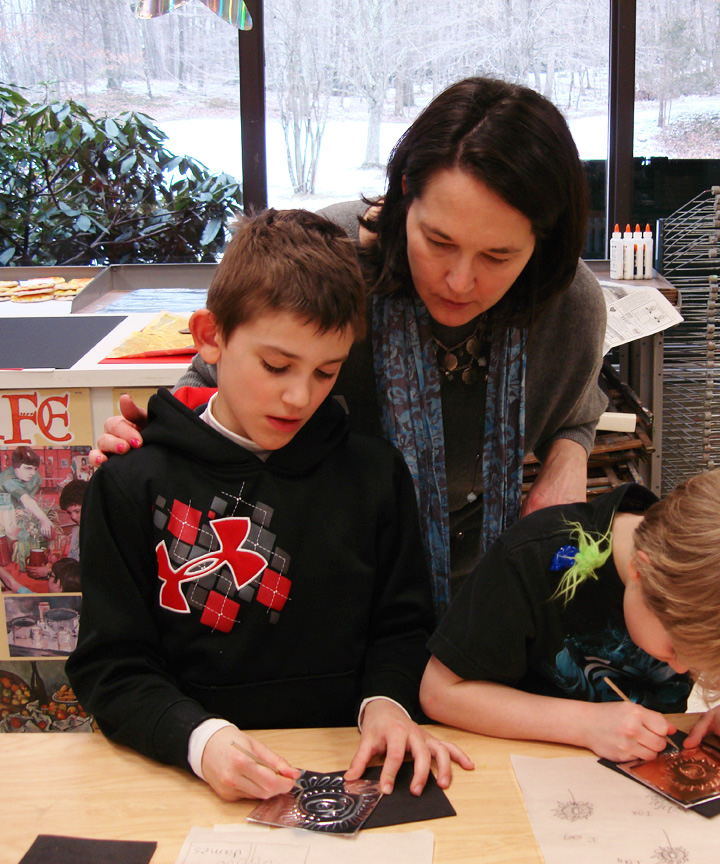
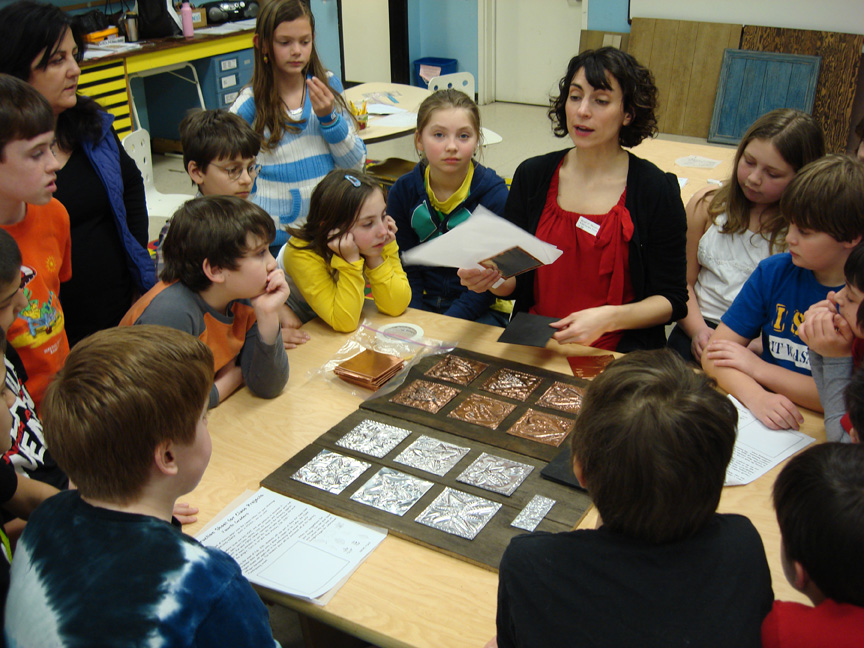
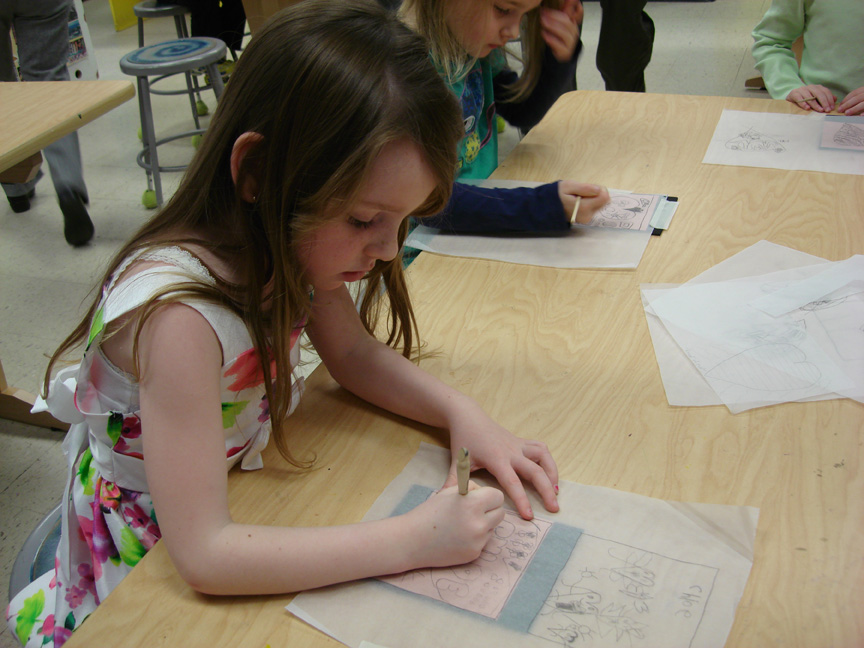
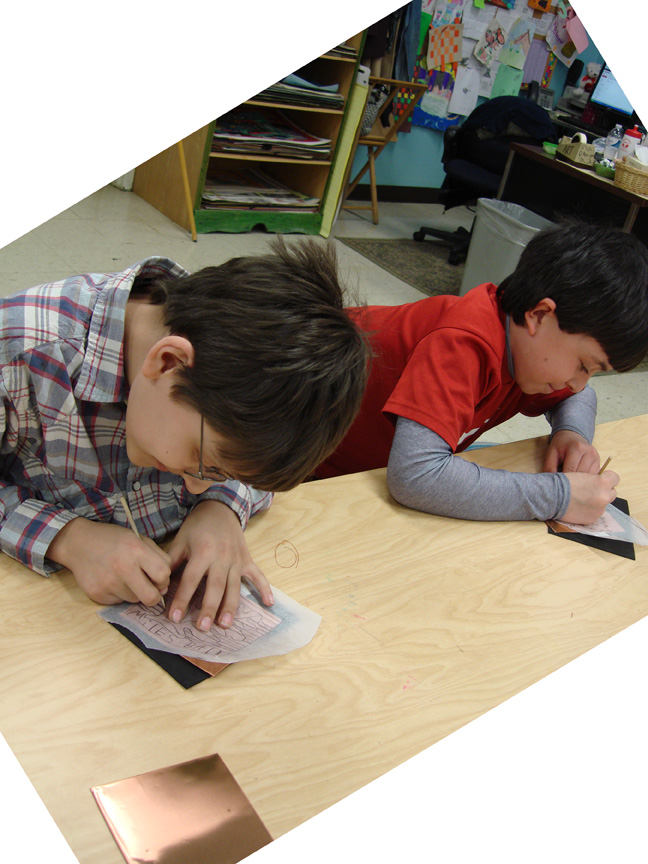
Then in class, we gave them a short demonstration of how to transfer their image from tracing paper to copper sheet, with some pre-made samples to help them visualize.
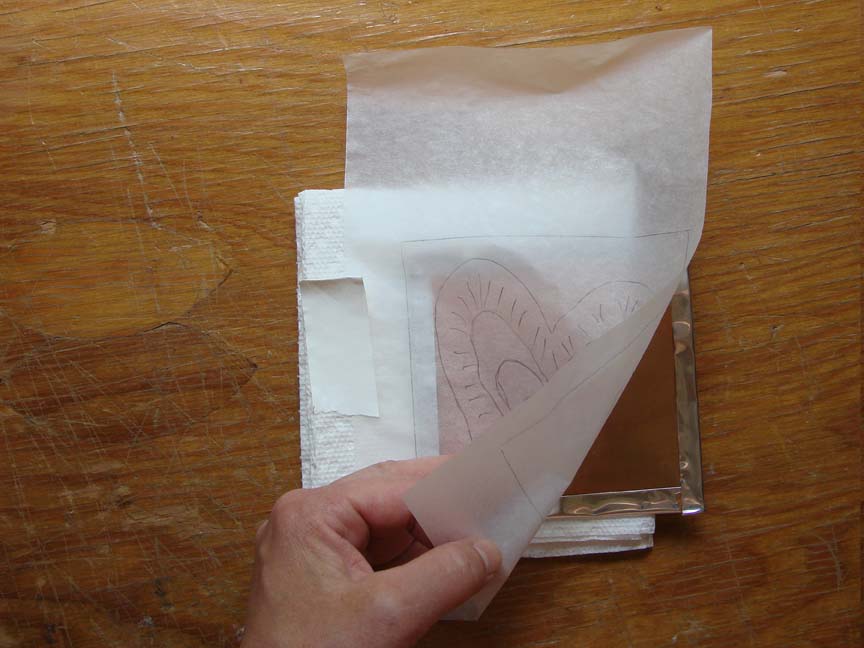
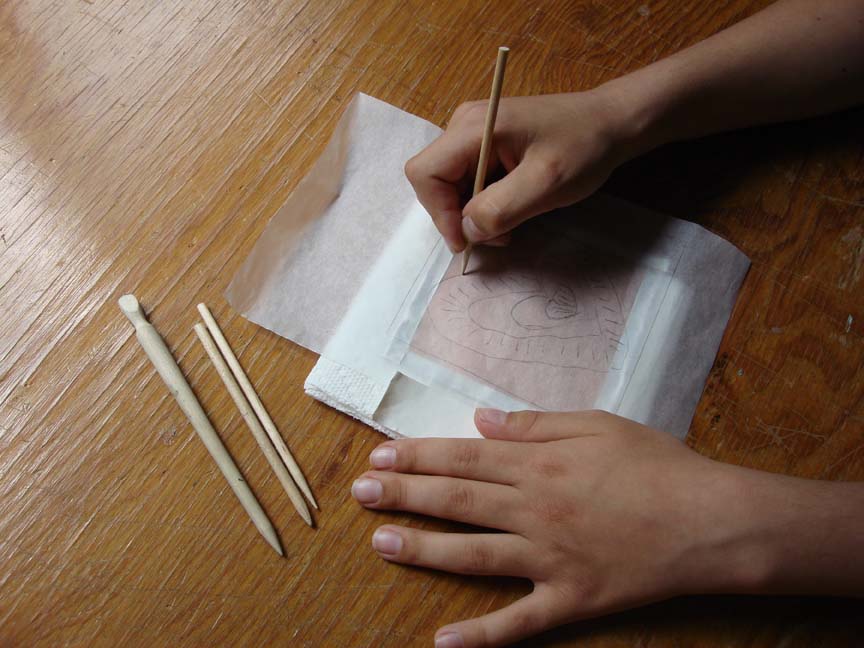
Here’s the How To: (See the entire Shopping List at the end of this post.) From the craft store get some sheets of 1/16th” thick craft foam and cut them a bit larger than the tins, approx. 7″ x 7″. Folded “quilted” paper towels work just as well. This acts as a cushion under the tin, to give the engraved line someplace to go. Place the blank tin on the cushion, and the tracing paper sketch on top of that. Use one piece of tape to hold the sketch in place and act as a hinge. Then as the kids are working, they can lift the sketch off the tin to see what they’ve done up to that point, and place it down again in the same spot.
The tools to use for this is are small wooden stylus (styli?). It’s like a pencil without the lead. Available from the art supply store, they cost next to nothing. Press down with a medium stroke, not too hard, not too soft, and trace over the main lines in your design. Then take the sketch off and work the tin/copper directly with the stylus. The bigger stylus has a larger rounded end that is great for softly pressing out larger areas. Look at your tin and decide which lines you would like to pop out rather than in. Flip the tin over, and, keeping it on the cushion, rub the lines, edges, and areas with the large rounded end. Then flip it back to see how it popped out. Don’t be afraid to experiment with patterns made with hatched lines, curly-cues, dimples, and “rivets” using the back end of the stick. Keep working both sides, back and forth, until it looks finished. Be careful, though, you CAN puncture the foil quite easily!
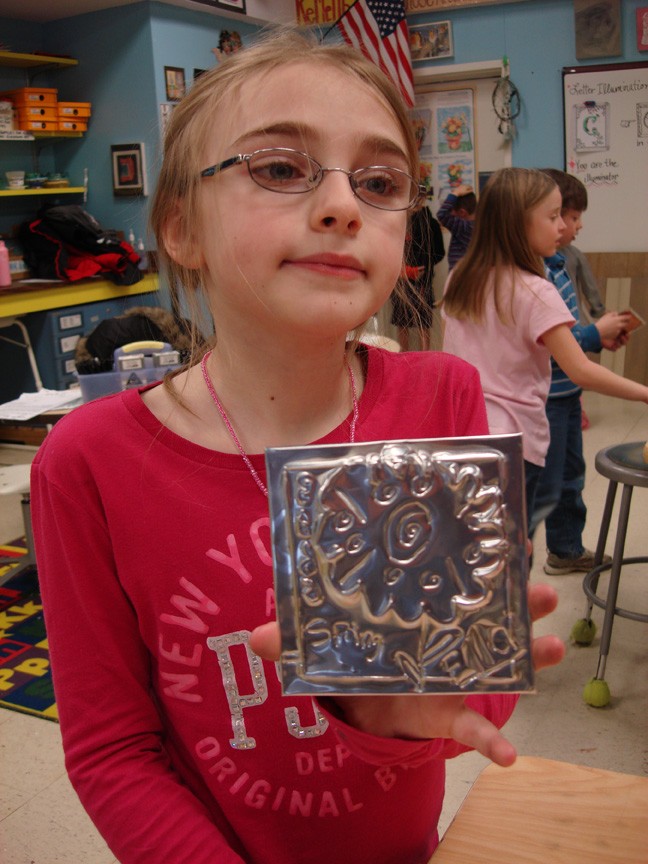
The kids absolutely LOVED making the 3-D effect!!
Ta-daaaa! Like it?
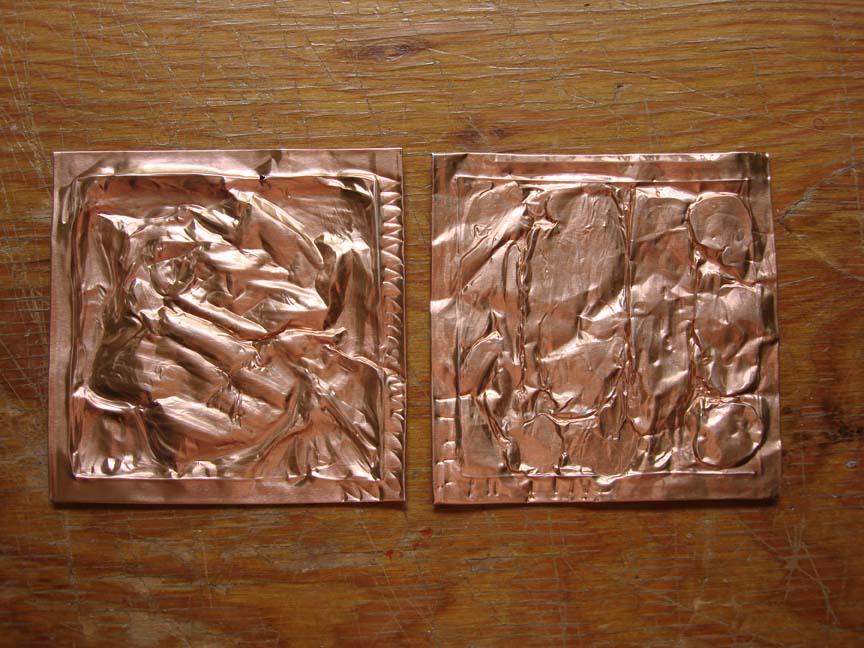
Caution: It is possible for overenthusiastic artists to overwork the tins, as shown below. If it gets worked to mush, there’s no going back–just get out a new tin and start over.
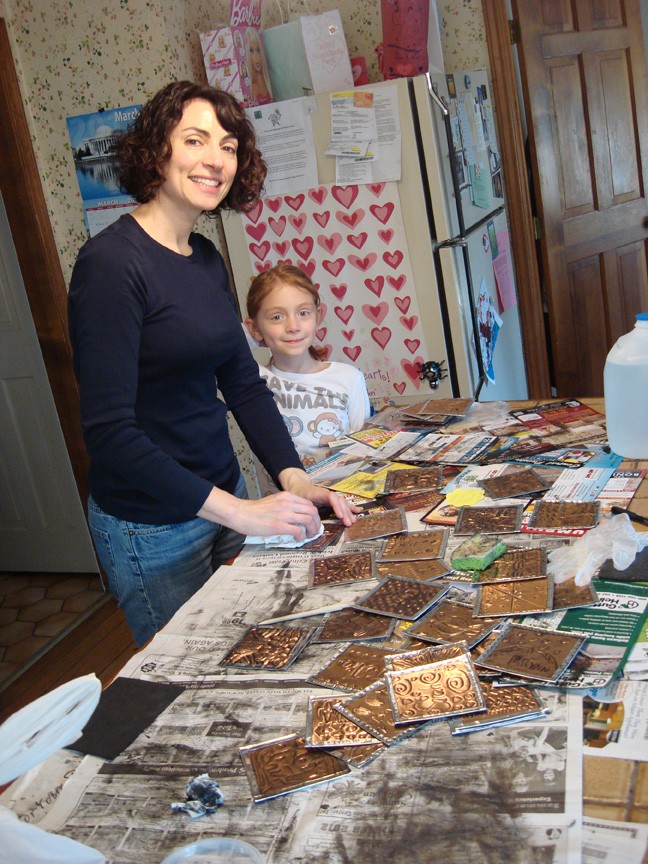
Adding Ink: When the kids were done with their part of the project, it was time for the grownups to get busy. As we were working with many classes, we kept each group’s tins together in a big ziplock bag, marked with their class name. We experimented with black inks, black acrylic paint, black watercolor paint, and ended up using a black india ink, which wasn’t necessarily water-based for cleanup. Lining our workspace with newspapers, and wearing latex gloves, we gently rubbed or painted a coating of ink onto each tin, enough to get the ink down into the crevices. Then we gently wiped most of it off again, leaving a richer impression of the design. As always, be sure to experiment on a few samples before doing the good ones.
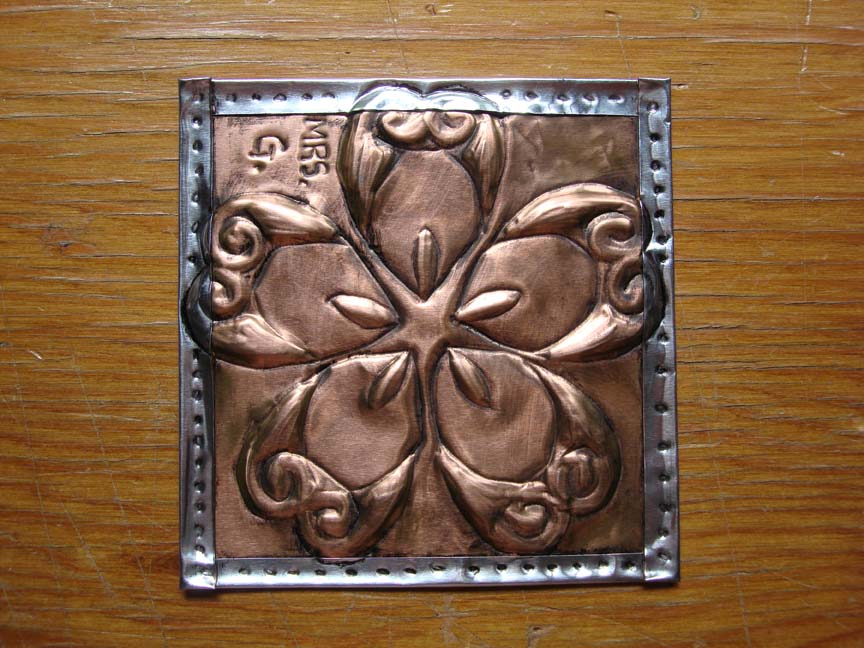
After “antiquing”: Doesn’t that add a nice extra dimension?
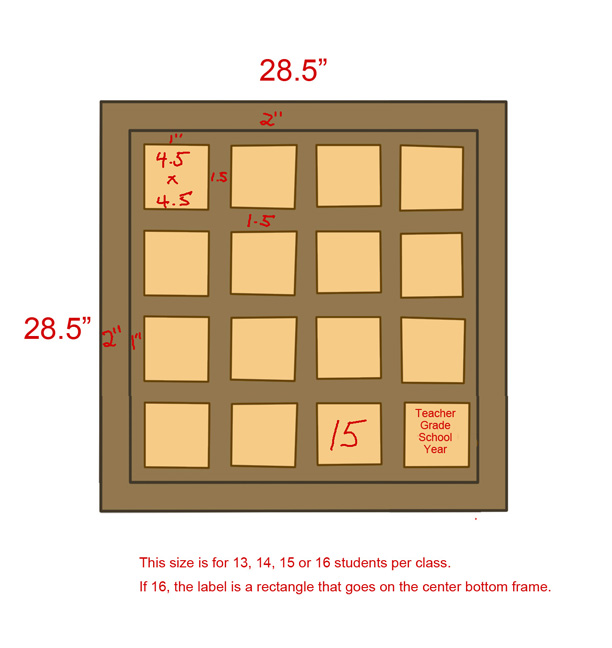
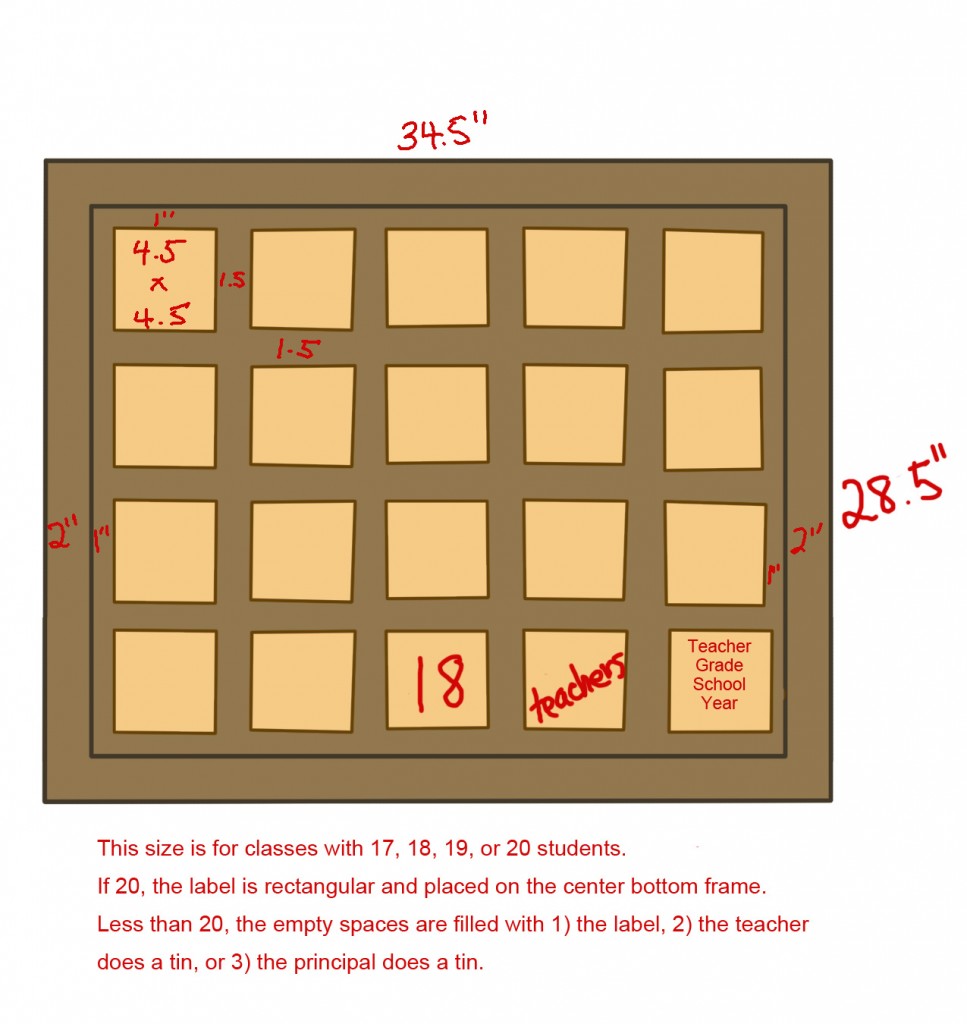
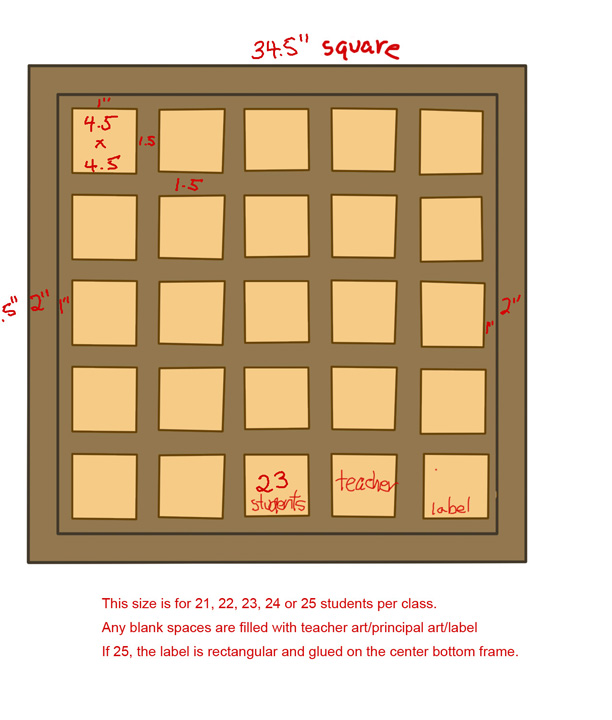
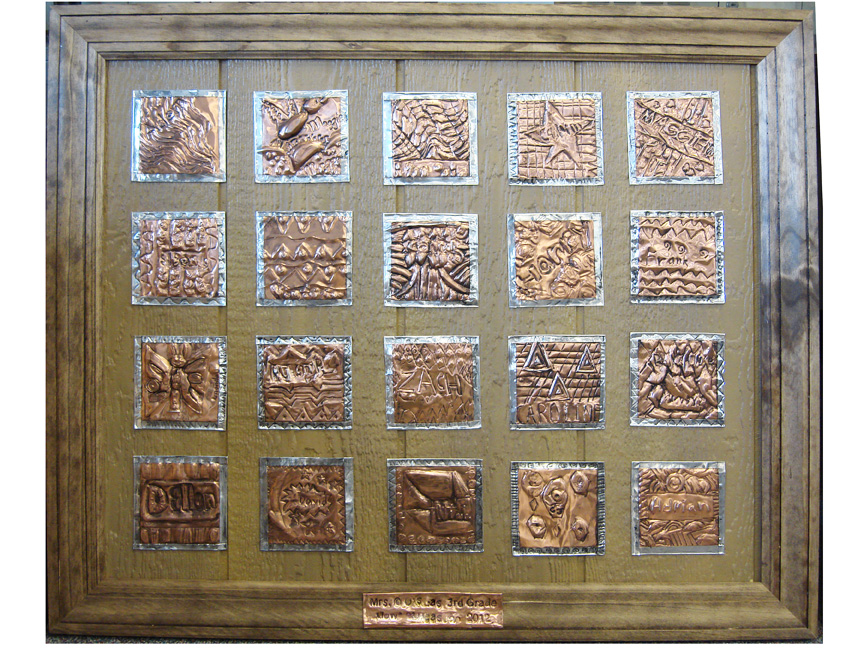
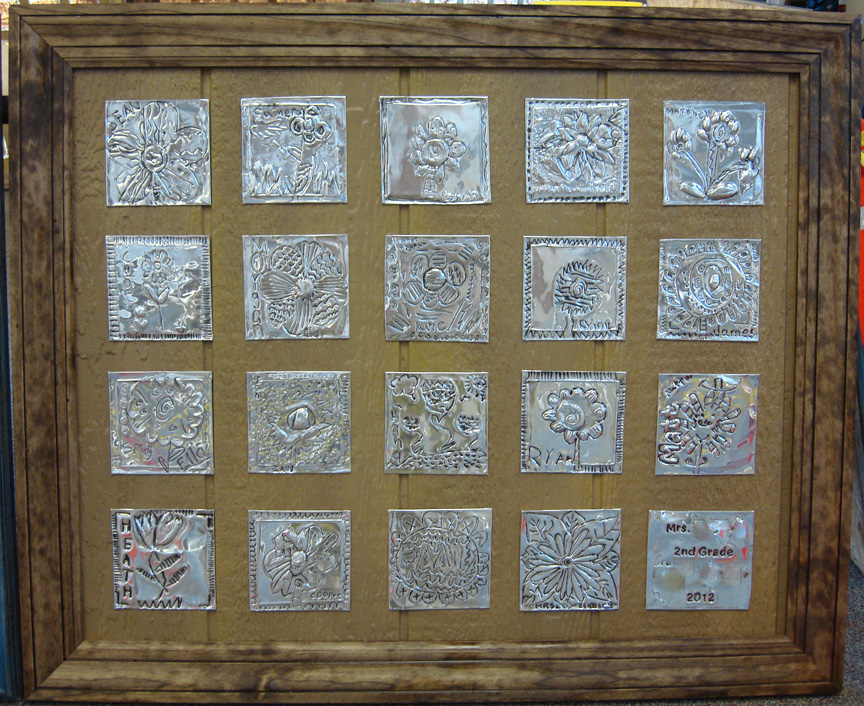
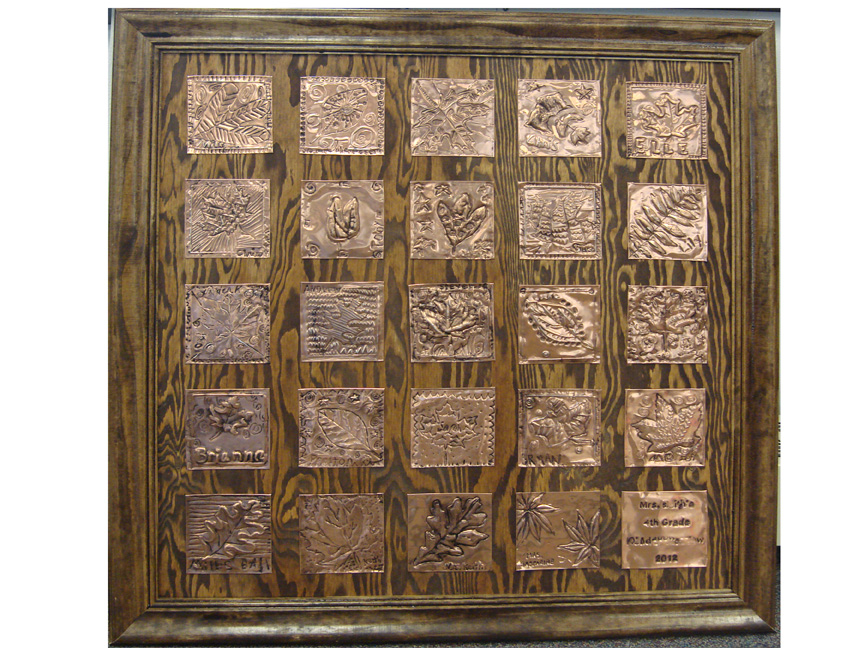
The Boards: One good solution we came up with for displaying this art was to create the frame by attaching mitre-cut chair-rail and crown moulding lumber to an antique barnwood or plywood board. This gave the pieces a finished look without having to deal with expensive framing or matting. We started by figuring out how many tins would be displayed on each board–how many kids in each class–and working out the measurements to make sure the boards were the right size, leaving a comfortable space between the tins and around the frame. It could be confusing, since we had 18 classes with anywhere from 15 to 25 kids in each class. For example, if it were a small class with only 15 kids, we used a 4 x 4 configuration, and asked the teacher to do the 16th tin. If it were a larger class with 25 kids, we used a 5 x 5 configuration. We factored in one tin for a label, marking the teacher’s name, grade, school name, and year–it’s an heirloom after all!
A Great Discovery: My original idea was to mount the tin and copper art onto real antique barnwood for a wonderful rustic look. But then I found out that real antique barnwood was not only very expensive, but also thick, heavy and non-standard in size. So I gave up that idea and went to the local home center’s lumber department to see what else they had or if I could use some kind of rough-hewn plywood. To my delight, it turns out, they actually stocked a beautiful fake antique barnwood, compressed from a mold! Approximately 1/2″ thick, it was uniform, lovely, and cheap at about $17 per 4-foot by 8-foot board! Who knew?? For variation, I also chose some half-inch plywood that had a naturally lovely pattern to the woodgrain.
So, measurements in hand, I had the friendly man in the lumber department cut the 4′ x 8′ boards to size. He gave me the scraps which are great for making small personal versions of the art. I also chose a couple of different chair rails and crown mouldings (pine is cheaper than oak). Since they come in 12-foot lengths, I figured out an approximate size to cut them down to for transportation. I left a few extra inches for when the carpenter would do the mitre cuts, after the staining and painting part. The lumber guy could not do mitre cuts.
Staining and Painting: We wanted some variety in the mounting boards, and so experimented with various colors of stain and paint on the plywood, the barnwood, and the frame moulding to see what looked best. The experimenting was important because some combinations that we envisioned would be great turned out yucky and others turned out fine. We ended up using mostly Golden Oak, Walnut and Blue stains, keeping in mind that these would act as a background to the children’s metal art, and so didn’t want to draw too much attention to them. The bright color of the blue stain was tempered by adding some walnut (dark) stain on top and then wiping it off immediately. I did encounter one unexpected problem in that one store’s brand of fake antique barnwood took stain beautifully, but another store’s brand, which looked identical when I bought it, had a sort of glossy finish that repelled the stain–Yikes! So since the boards were already bought and cut and I couldn’t return them, I bought some cans of spray paint and sprayed the boards to the right color. Just saying, experiment on some small pieces first to make sure your materials like each other.
Since I had 18 boards and 72 frame sections of various combinations of colors and sizes, I wrote the name of each class on the backs of all the parts. This came in handy when it was time to assemble them. This part of the project took a week or two to complete. Also, it was early Spring so I had to rely on the weather for some relatively mild days since this part was an outdoor job.
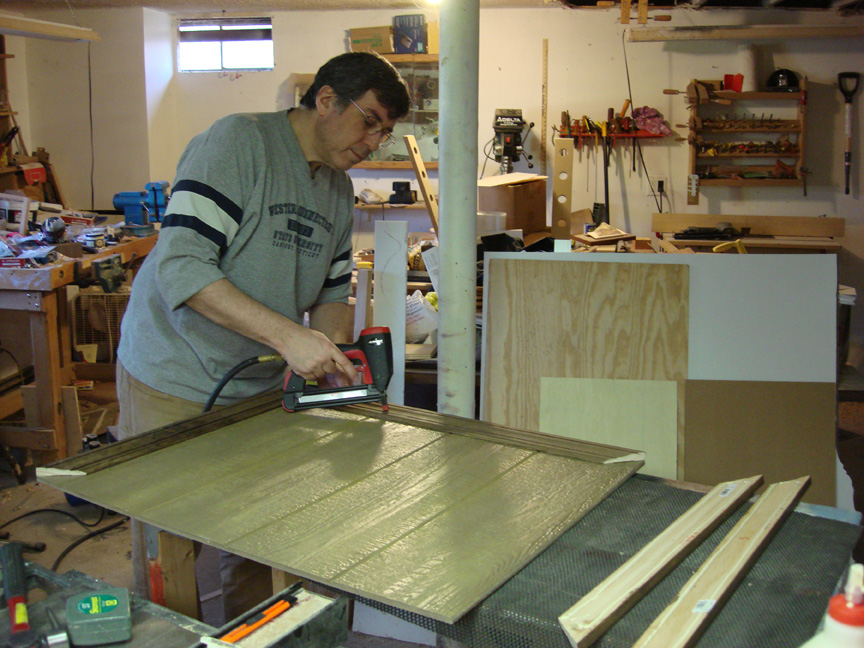
Attaching the Frames to the Boards: After the boards were painted, stained and dried, I carted them off to a local friendly carpenter. He mitre-cut the frame pieces to fit each board, then applied wood glue and nail-gunned the frames right to the boards. With our little production line of me keeping everything organized and him cutting and nailing, it took only about 2 hours.
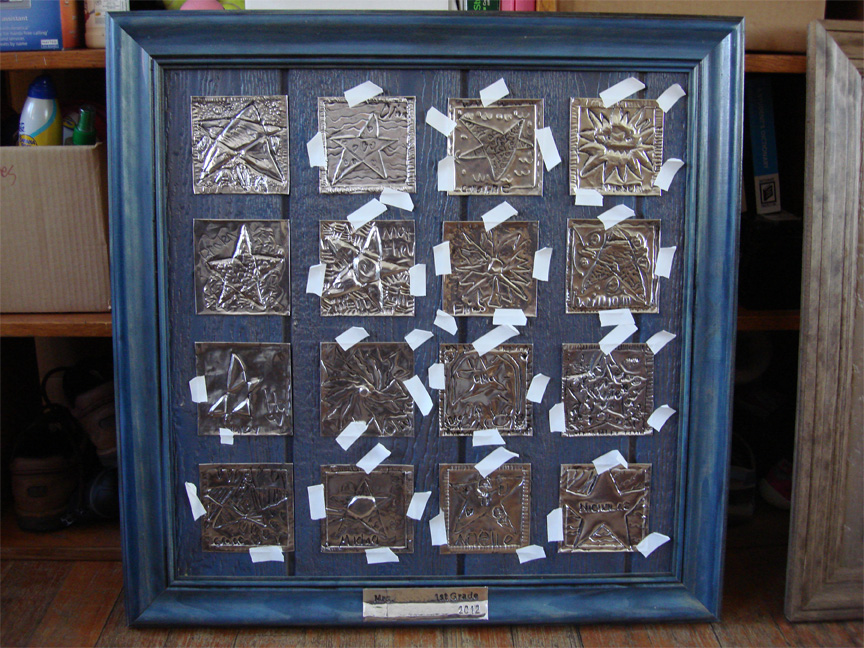
Mounting the Tins: Again it was time for the Volunteer Moms to come to the aid of their school. We brought all the bits and pieces to the school and set to work arranging each class’s art tins onto the prepared boards. We laid them out in a pleasing arrangement, then taped each one in place with one piece of white artists’ tape on the top to keep it in position. Once in place, we lifted each one and applied a moderate amount of Liquid Nails to the underside of the tin, and laid it back down. Then to keep it still while the glue dried, we put two or three more pieces of tape on each tin. The beauty of white artists’ tape (that’s what it’s called–“Artist Tape”) is that it seems to stick when you want it to and comes off when you want it to, without pulling anything else up with it, and can be used over and over. Well worth having around for all sorts of projects.
We flipped the boards over and affixed hanging hardware (the little metal triangle hinged to a small screw) and picture wire to the back, for carrying and so that it would be ready-to-hang for the buyer. We let the Liquid Nails dry overnight, then gently pulled all the tapes off the next day.
Oopsy! We had a great idea to use very small brass-headed nails to affix each tin, thus adding another small but nifty texture and color interest to each board. But when we started trying to hammer the little buggers into the boards, we found it was way to hard to handle the 1/2″ long nails, so we gave up that idea, deciding that it wasn’t worth the trouble, and the art didn’t suffer from the lack of it.
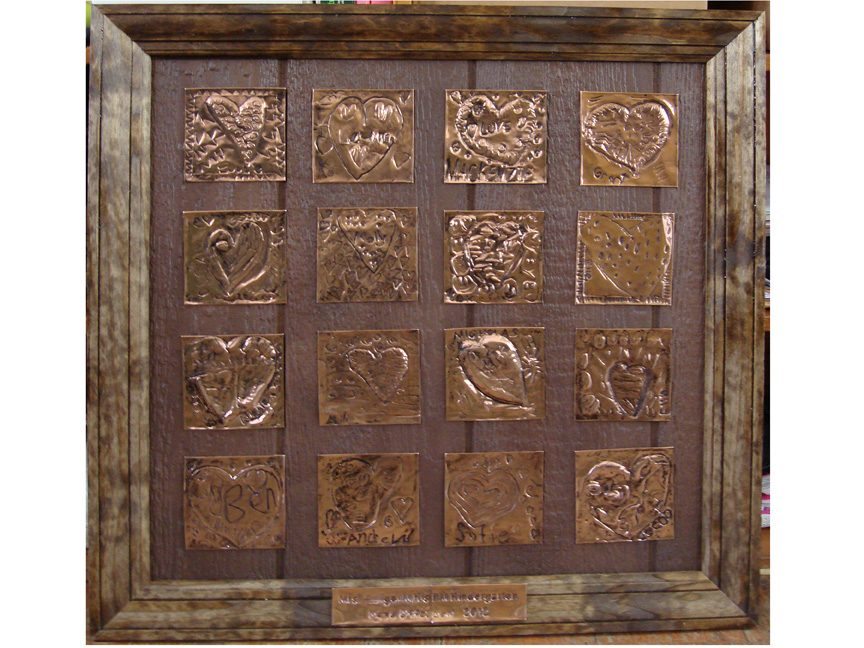
Et Voila, here are some of the finished boards. Note the themes of hearts, stars, flowers, patterns, and leaves.
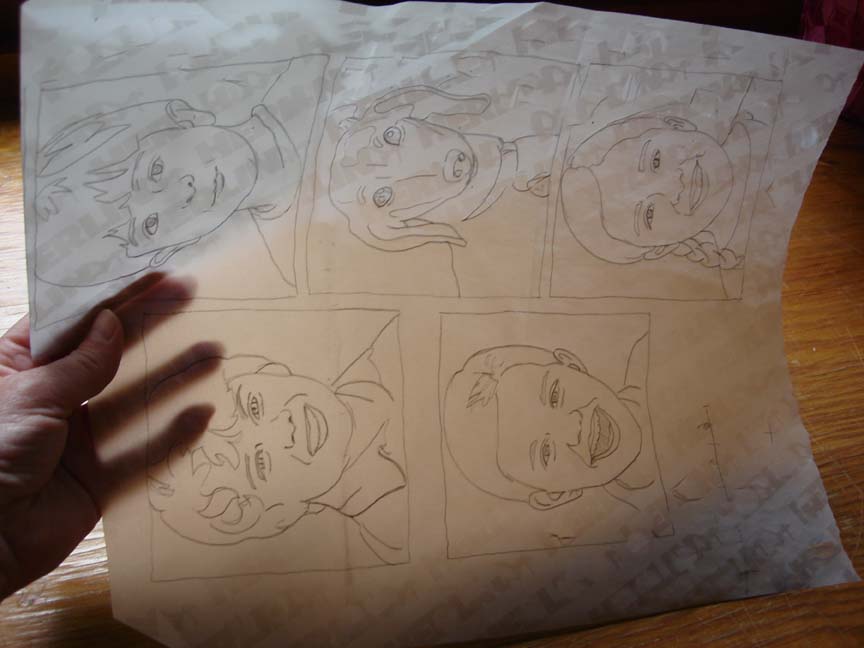
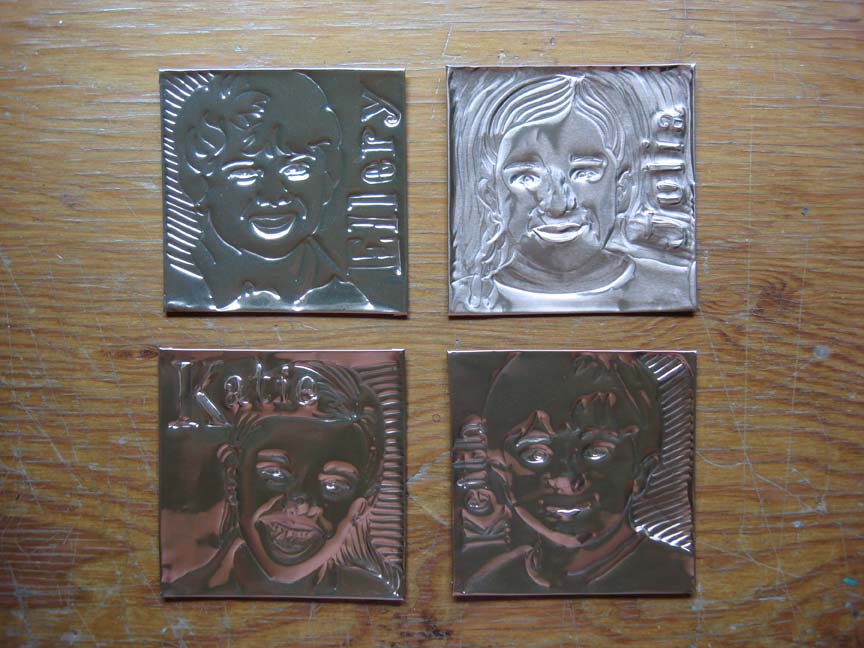
A Footnote: I also tried making little tin “portraits” by tracing the outlines of the kids’ faces onto tracing paper and then transferring them onto the copper sheets. How’d it come out? Hmmm, well, it worked…sort of. Judge for yourself:
Was it Worth It? At auction, the artworks sold for an average of $280, with one of them going for well over $1,000! For a grand total of $5,100, our costs were approx. $900. As both a PTA fundraiser and an end-of-year school-spirit-building project, I would absolutely do this again. Just be sure you have project coordinators who have the time and dedication to fuss with lumber, paint, stain, ink, glue, and Mom-scheduling.
Shopping List: These amounts are approximate.
From the Craft Store:
400 sheets of 11″ x 14″ Tracing Paper = $60
3 bottles of Black India Ink = $15
36 pieces of hanging hardware and picture wire = $30
12 sheets of 9″ x 12″ craft foam, about 1/16″ thick = $10
From the Home Center:
18 boards cut to size (from about eight 4′ x 8′ sheets) = $155
18 x 4 = 72 pieces of moulding, cut from 12′ pieces = $325
Brushes, foam brushes, paint buckets, and rags, latex gloves = $30
3 quarts of Stain, a few cans of spray paint, 4 tubes of Liquid Nails = $75
Ordered from Art Supply Store online:
37 packs of 12 = 444 Foil Squares = $122
1 pack of 100 wooden stylus sticks = $2
6 maple spindle tools = $13
Carpenter:
2 hours x $50/hour = $100
Thanks for sharing the details of this project! They are gorgeous! I’m just starting a community art class for kids. Embossing is a great art form to add to the list of our “Exploring the Art”. Auctioning the piece is a great idea too, since the classes are free to the kids and we are relying on donations! Thanks again!
We are thinking of doing this for just one class and with 25-30 kids….not completely sure! So the shopping list is for ALL of the classes you did right?? Could you give me an adjusted list for just 30 kids/one class?? Your notes are SO helpful and I LOVE the way it looks!!!
Shawna, were you successful in getting the list for 25-30 and if so, would you be willing to share with me? Thank you!
Thank you for the excellent instructions! I appreciate the time you put into posting them; I know it took you a long time.
The project is beautiful; I can’t wait to do it with my 4th graders for their auction project.
Thank you.
I am excited to do this project for our school auction….blossoming third graders, our theme is flowers….thank you so much!
LOVE!!!! What kind of stamps did you use to stamp the teachers’ names?
I did not use a stamp; I typed the names/words the size I needed it, printed it out, put tracing paper over it and copied it by hand, then put the tracing paper on the foil and traced again, just like the art. Once it’s antiqued, it stands out nicely. Hope this helps!
:Donna
Thank you for sharing this art project! Your instructions seem easy to follow and I look forward to trying with my students next year. One question, did you use 36 or 38 gauge foil?
You’re Welcome! Here’s the link for the foil: https://store.schoolspecialty.com/OA_HTML/ibeCCtpItmDspRte.jsp?minisite=10206&item=529060
I wonder if they made a typo on their listing, referring to it as both 36 and 38 gauge. I’m sure either would work. HAVE FUN!!
Thank you for sharing all these details! Was the Liquid Nails thick? I have no samples so am proceeding cautiously. I don’t want the sheets to be raised too high off the board and want to prepare to spread the Liquid Nails if necessary. Did you put it on in spots like the corners and the center or did you coat the backside of the sheet? Also, we had trouble with the India ink not wiping off very well so we used alcohol prep pads which helped but we had to be very careful because the copper color would wipe off if we went over it too many times, revealing the silver under color. It didn’t look too bad so we kept the sheet instead of having the student re-do it. Thank you for your assistance!
Hi Michelle, The Liquid Nails worked pretty much like Elmer’s glue, we put 5 or 6 spots on the back of each tin. Thank you for the insight about the alcohol prep pads, good to know! Sorry I didn’t respond sooner, I hope all went well and everyone was delighted with the finished product!
:Donna