Give a Kid a Grid! While we’re on the subject of whole-school art projects, here’s another great one we did. Everyone liked this project because the kids got to see how coloring in squares on a paper grid translated to a functional, heirloom piece of art. Again, I’m writing about this with all the considerations of collaborating with 400 elementary school children, teachers and volunteer moms. But you, fun art project lover, can cherry-pick out the materials, techniques, and inspiring finished pieces to get yourself started on a more manageable scale.
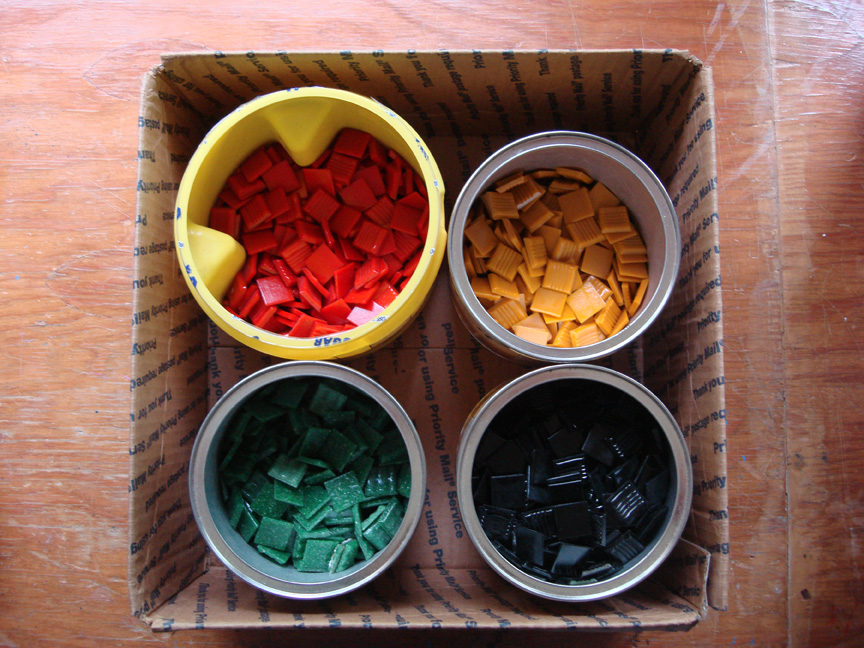
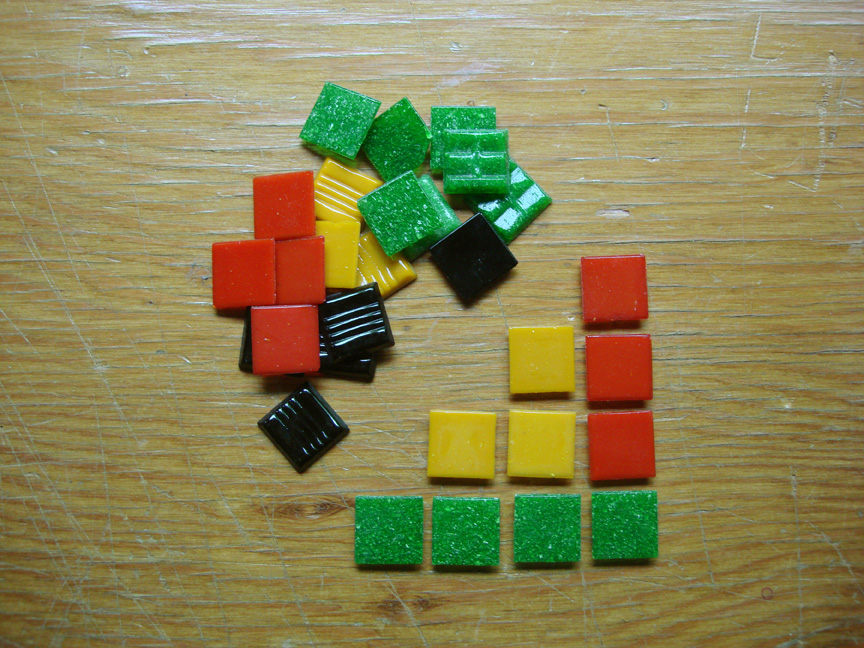
Where to start: Measurements! I found the nifty purpose-made tray blanks on Aftosa.com, where they have many such products and supplies to help and inspire artists and craftspeople. The 3/4″ ceramic tiles I found on OpusMosaics.com, where it is exciting just to browse through the comprehensive selection of mosaic tile colors and finishes! And Josh in Missoula is very helpful!
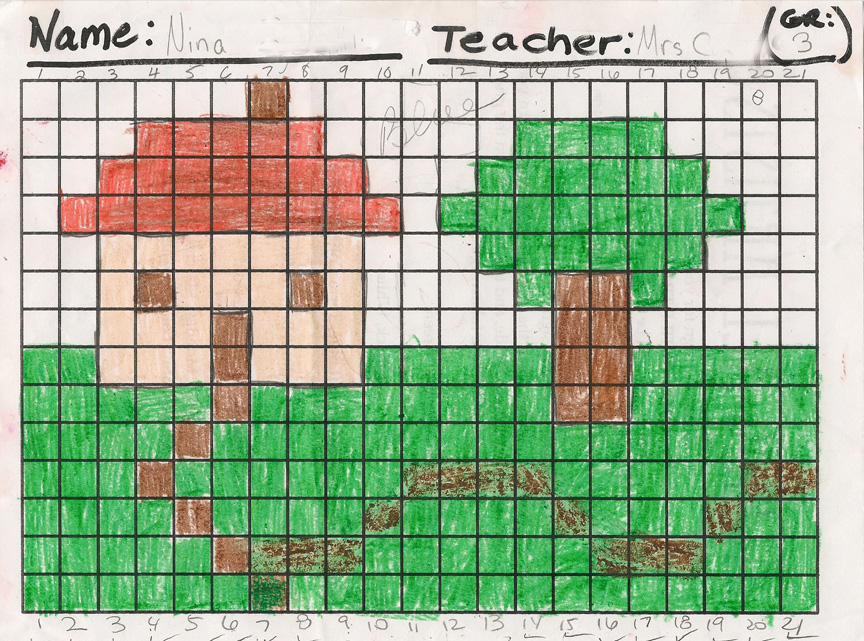
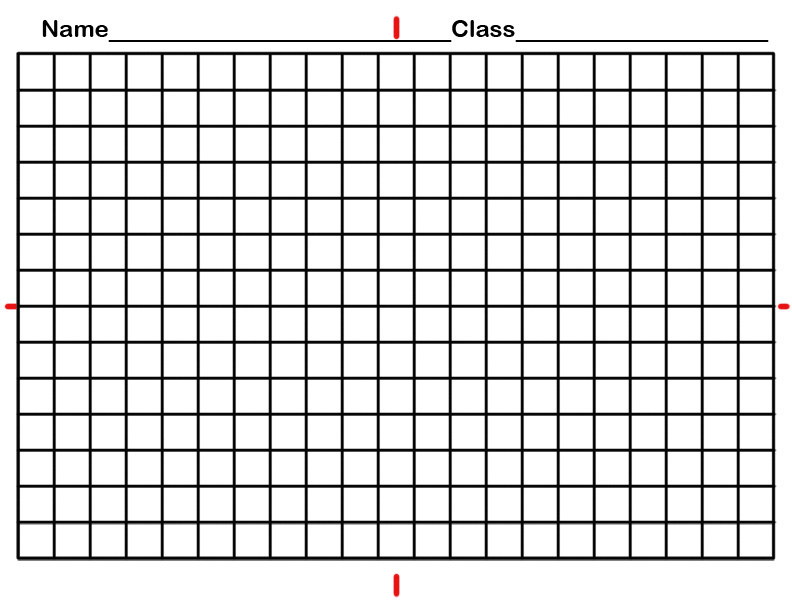
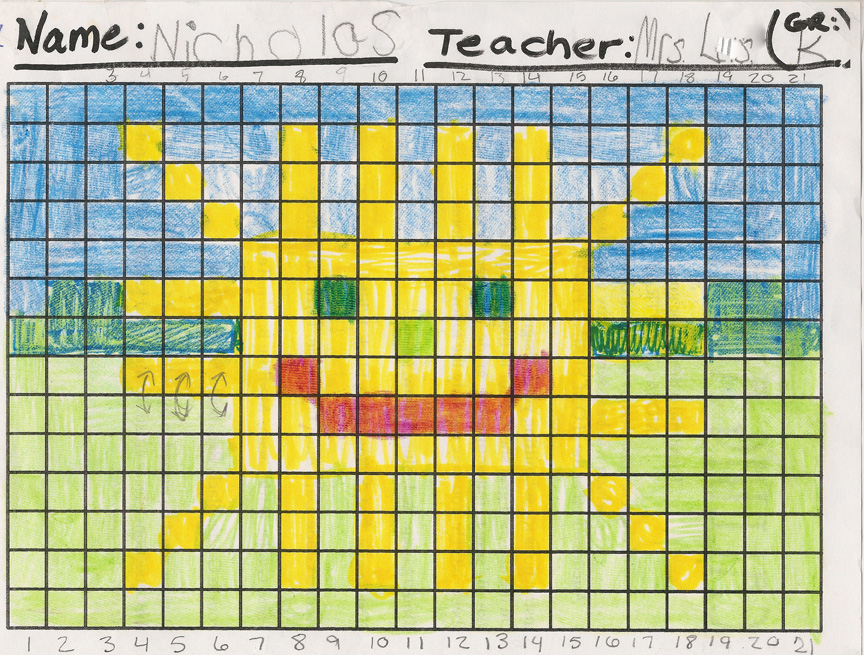
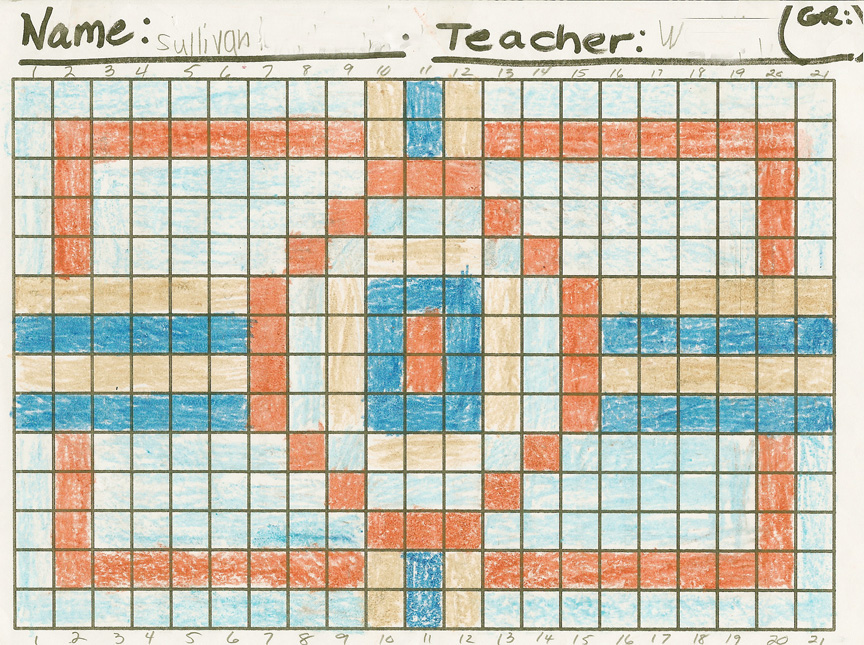
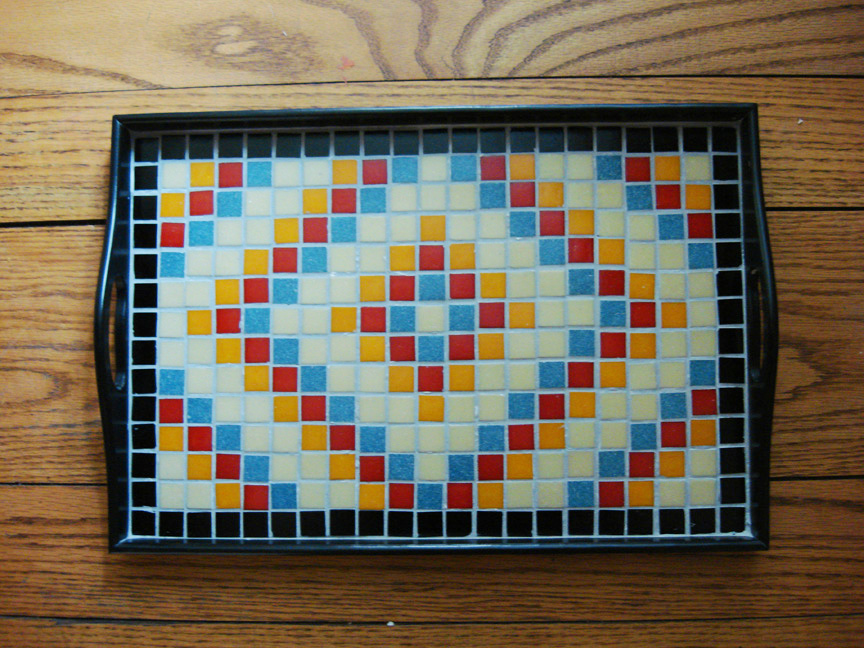
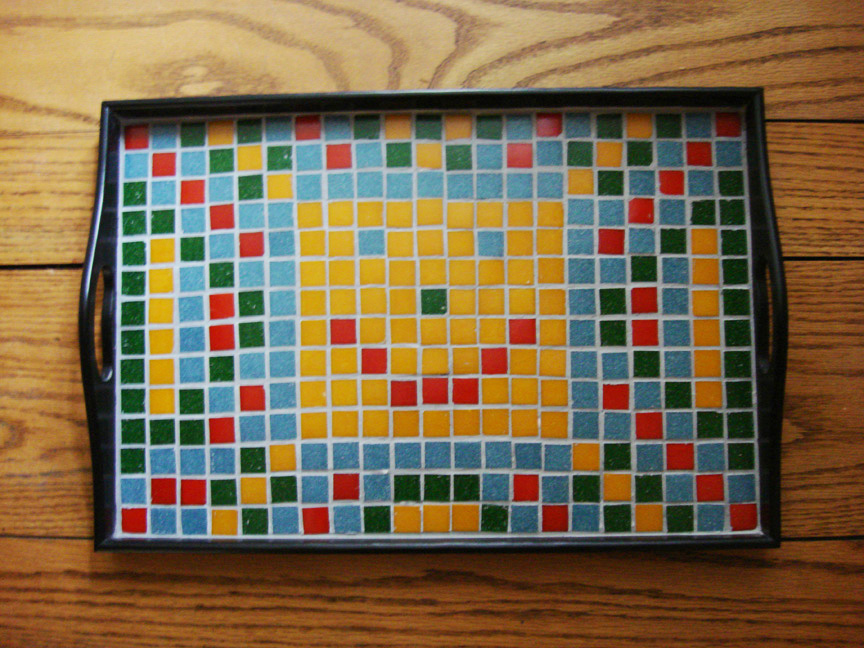
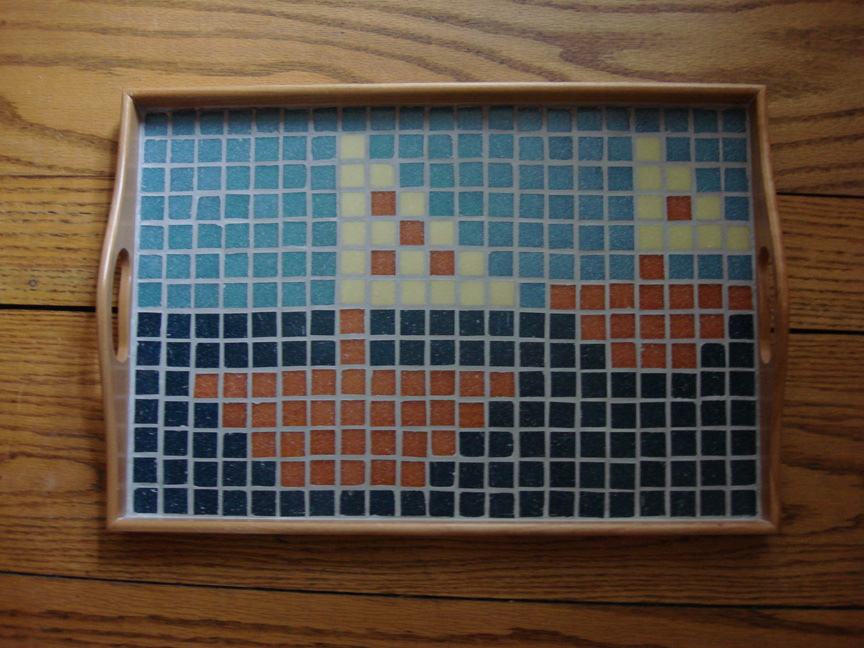
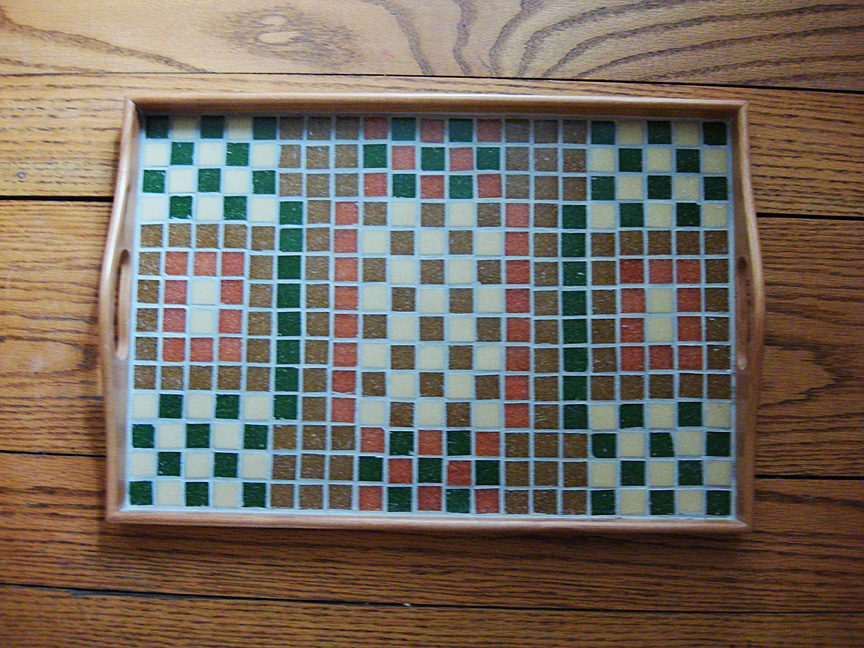
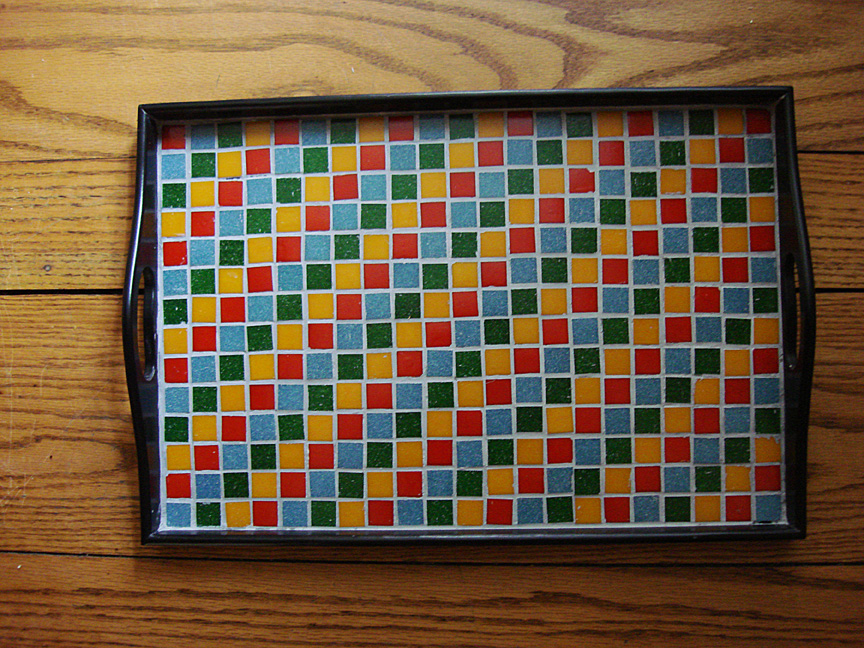
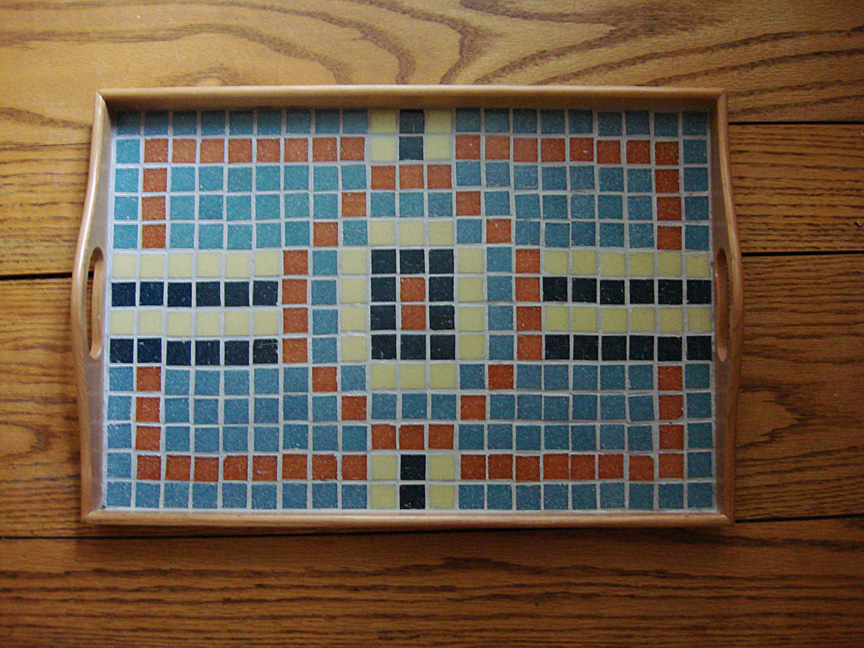
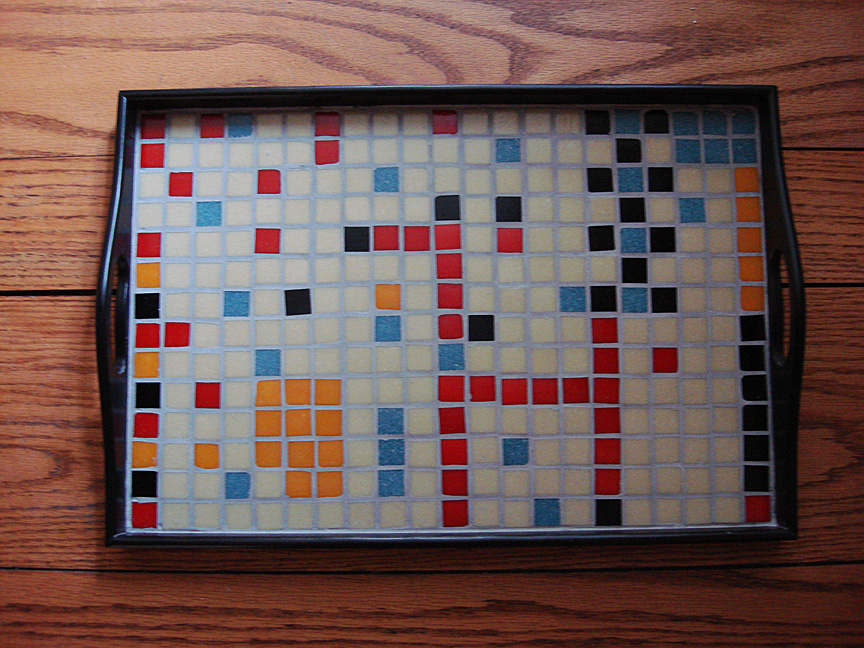
First Things First: You have to know the measurements of your tiles and your ground, and how much space to leave between tiles, before you can create the grid to begin designing. In this case, it worked out to 14 squares by 21 squares. So I printed up 400 of these grid sheets and passed them out to all the students, with instructions to make a design, any design. The only thing I limited them to was a color palette. This was key, and here’s why: if you leave them with the whole rainbow of colors, there’s too much choice, and the designs are likely to come out all over the place. Also, it would have been a nightmare, and cost a fortune, to try to match the numbers and colors of the designs to the selection of tiles available. But, if you start with a small selected palatte of colors, say, 4-colors that go well together in any combination, then you could practically throw the colors in at random and the tray would still come out beautifully. So, armed with this creative protection, we gave the Kindergarteners a color vocabulary of red, blue, yellow and green. The First-graders got red, blue, yellow, black and off-white. Second-graders were assigned light blue, dark blue, terra cotta, and off-white. Third-graders were given light green, dark green, terra cotta, and off-white. Fourth-graders had black, red, off-white, and, because they were the upper-classmen, metallic gold…oooohh.
And we were pleasantly surprised with what they came back with! It was interesting how, given the limitations of the grid, the kids’ designs became more focused and organized. Some did representational images (house, tree, sailboat, sun). Some tried typographical designs. Some were oddly and interestingly abstract. But we were most surprised by the symmetry, the borders, the designs that followed the constraints of the grid, like checkers and diagonals! Well done, children!!
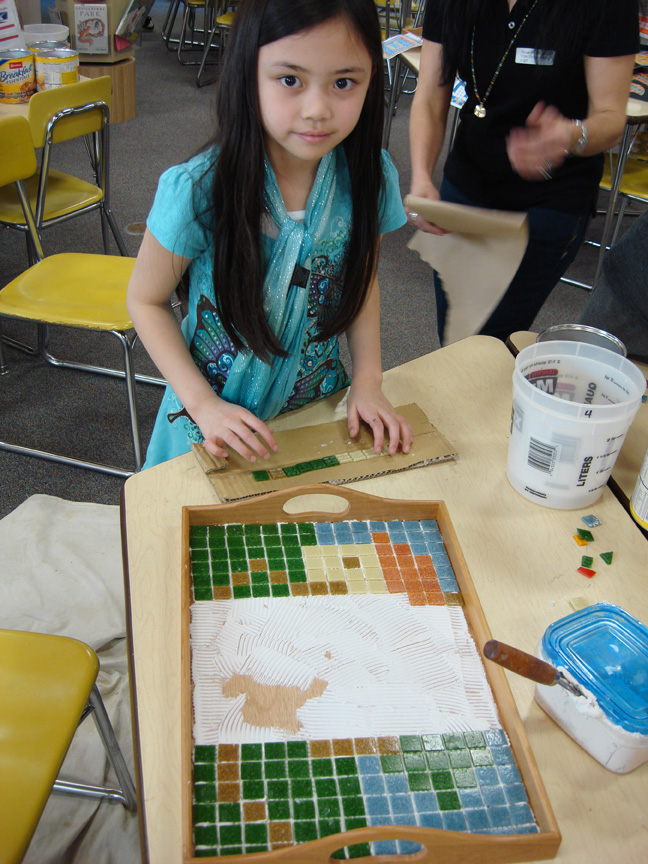
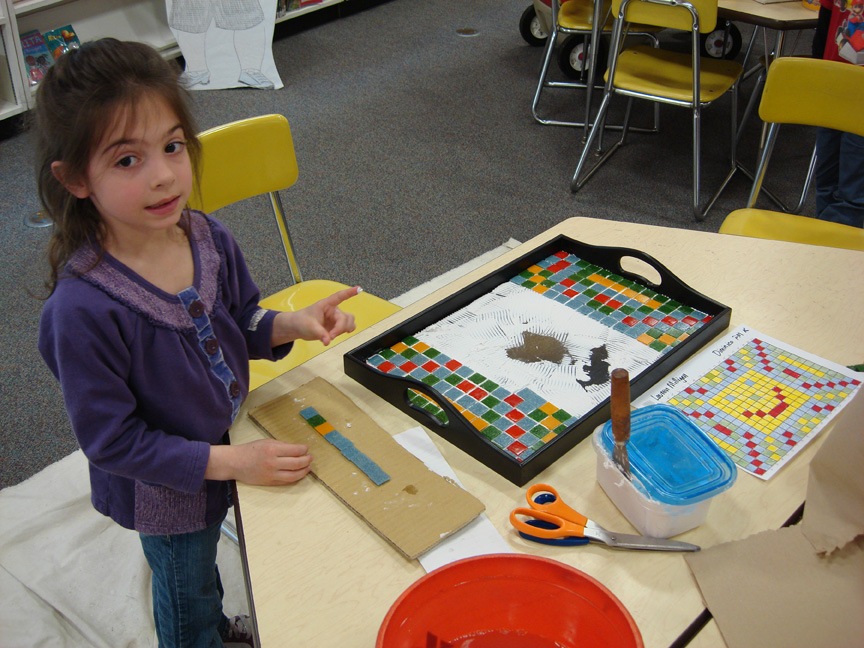
Because it would have been beyond the scope of anyone’s time and budget to do one tray per child, we chose one design per class. The kids were very supportive of the student whose design was selected to represent the class, and they all got a hand in to lay the tiles.
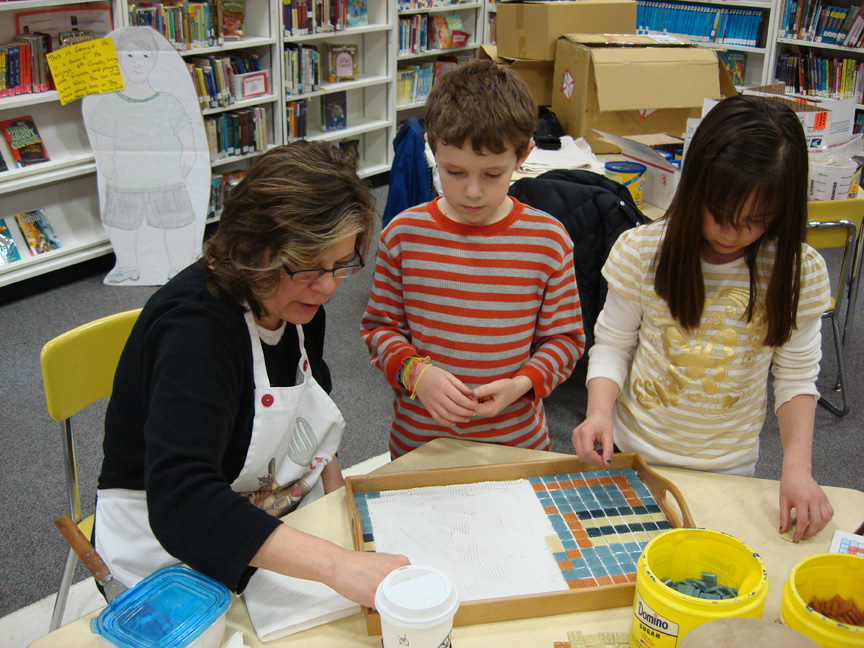
Schedule the Volunteer Moms: Our wonderful school librarian kindly offered her class times for everyone to do the project. So, knowing the library schedule, we asked any Moms who wanted to participate, to come during their child’s library time during that week. Their assistance was greatly appreciated in getting the kids lined up, showing them the pattern, helping them choose the right tiles for the row in the pattern which they were to lay, and getting their little fingers washed up from any adhesive they might have picked up in the process.
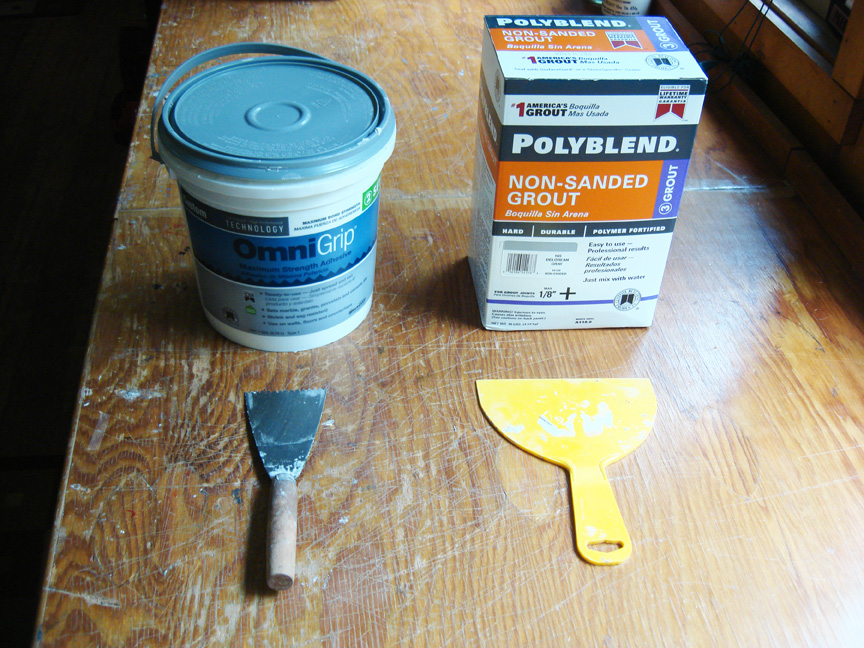
Adhesive, Grout and Tools: From the hardware store, I got a bucket of tile adhesive and the metal tool with 1/8″ teeth along the end. When spreading the adhesive, the teeth form ridges that make the tiles stay in place better. The tiles, too, have a “toothed” side to them, which goes down into the adhesive. Tiles go flat side up! The grouting part comes later.
The Tricky Part: So, for each class, and each tray, we had a tight little production line that took about 30 minutes per tray. I, Keeper of the Adhesive, would “butter” the tray starting at the right and left sides and working toward the middle. If I applied all the adhesive at once, it would dry out by the end of the 30 minutes. Too much adhesive and it would squirt up between the tiles and look bad after grouting. If we started at one side and worked toward the other, the spacing would get too far out of wack. So, the trick was, to show each child where to lay his row of tiles, and as he laid the row, quickly scooch the tiles into a more accurate position, keeping an eye on the overall spacing. To keep the adhesive more manageable and keep it from drying out, I transferred about 2 cups of it into a plastic container and kept the lid on as much as possible.
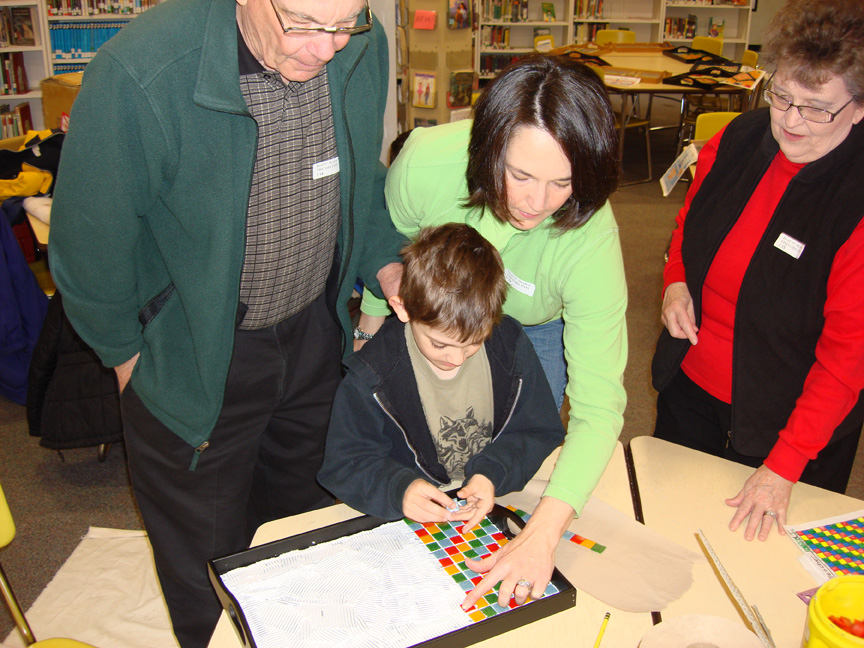
Even visiting Grandparents love to help 🙂
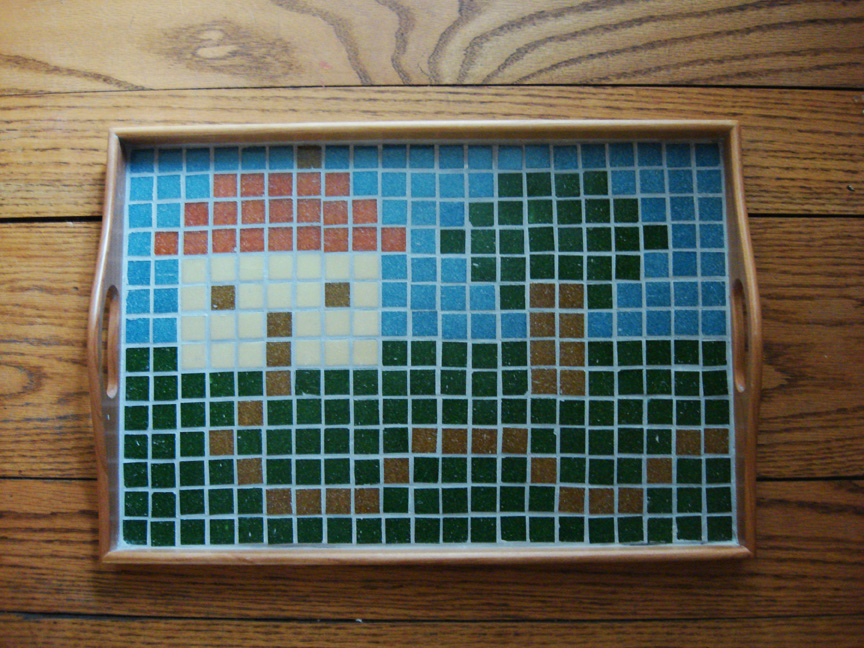
Grouting: Ugghhh. When the kids’ part was over, and the adhesive had dried overnight, I took all 20 trays home to do the grouting. Do Not let schoolchildren grout! It took a friend and I a whole weekend to do, and wasn’t too bad once we got the hang of it. Dark, light and colored grouts are available but we chose a middle-gray color, which unifies everything nicely. Following the directions on the box of grout, we mixed it in a 5-gallon bucket, to the consistency of peanut butter. I found that I could add a bit more water and make it the consistency of slightly soupy, rather than thick, peanut butter. We had a big pile of clean rags and several small buckets of clean water ready. We spread the gray peanut butter all over the hardened tiles using the pliable plastic squeegee, squishing it inbetween all the tiles as we went. This was a tricky part: You have to let it set long enough that it won’t lift up from between the tiles when you’re wiping, but not so long that it dries hard on the tile surfaces. Once we found that magical time length, we took a succession of damp, not wet, rags, and cleaned, and cleaned, and cleaned, removing the excess grout in about 3 or 4 or 5 stages. Rinse the mucky rags in water buckets of graduated cleanliness. It’s kinda scary the first time you cover your beautiful bright colorful tiles with mud that appears to be drying on it. But fear not– it’s still there under the haze. In fact the most satisfying part of tile grouting is removing that last layer of grout haze, and seeing the finished surface come shining through!
The biggest lesson we learned was not to try to do 10 trays at once–the grout dried too fast, before we could clean and clean it, and if it completely dried on the surface of the tiles, we were scratching hard bits of it off with our fingernails–Ugghhh! Better to do 2 or 3 or 4 at a time. Throw out all the rags when you’re done, you don’t want to wash them in your clothes washer. Empty the water buckets outside in the woods, NOT in your sink!! The grout sinks to the bottom of everything like sand.
And here are the terrific results. Look at this wonderful variety, all designed by elementary school children!
So, Was It Worth It? The cost for 20 trays was about $400. The tiles cost around $450. Add about $50 for the grout, etc. and the total project cost came to approx. $900. At the auction, the trays brought a total of $2,380, which averages $120 per tray. So the net profit was $1,480. This was pretty good for the year the economy tanked. Keep in mind that this is not a retail selling of the tray, but a school fundraising auction where parents are making a donation to the school by being the highest bidder for the class project. And again, the value of a project like this is not just in the cash it raises, but in the school spirit it raises!
Did You Enjoy This Post? You can thank me by going back to my homepage (www.donnakernball.com) and buy my children’s book, “ABC-What Would I Be?”, in print or E-book form. There, how’s that for shameless self-promotion?
What a great idea! I love the idea of this creative project – but what I love even more is the idea of a project that can draw community volunteers into the schools.
I could see this being done inside a retirement or assisted living facility as well – wouldn’t this be a great idea for a scout troupe or other youth organization as a way to socialize with older folks who may not have the chance to get out.
Thanks for the great ideas and the detailed instruction guide!
So glad you like it! Good idea to extrapolate to other kinds of social groups!