Our town had an annual arts festival last fall, and I wanted to have a booth to promote my newly-published children’s book, “ABC–What Would I Be?” But I wanted more than just another author-illustrator booksigning booth. I needed a good gimmick to “bring ’em in”, to add to the creative atmosphere of the festival, and to involve my ever-present 11-year-old son and his pals. It had to involve the book’s subject matter, which is an illustrated alphabet of occupations: Artist, Baker, Carpenter, etc.
While brewing all this in my head, an early childhood memory crept in: When I was in kindergarten, some high school girls held a little Spring carnival for us. At one of the booths was an old-fashioned camera, the big-box-on-a-tripod kind, where the photographer hid under a black cloak to protect the film. I was asked to sit up on a barstool and smile for the camera. The “photographer” (wink, wink) then flashed the bulb, and as I was helped down from the barstool I was handed “my” picture. The glossy “portraits” of famous models and actresses had been cut out of magazines, but my 5-year-old brain didn’t process that. So for a very long time after, I was absolutely convinced that I was the spitting image of June Lockhart!
Since this was the age group I was aiming for, I thought it would be fun to replay this cute trick only instead of showing them their “outer beauty”, I could plant the suggestion of future occupations. Thus was born the idea for
“The Compu-Job-Predict-a-Tron 1000”.
Now, this particular retro-machine computes a prediction of a child’s future vocation, but the idea could be extrapolated to any machine that tells one something about themselves, like fortune cookies or horoscopes. As long as it looks brainy, and the information it gives is positive and self-esteem-affirming, you can make up your own fun prediction machine. Just be sure that you make it clear that it’s for fun and that you make no claims of accuracy about the predictions!
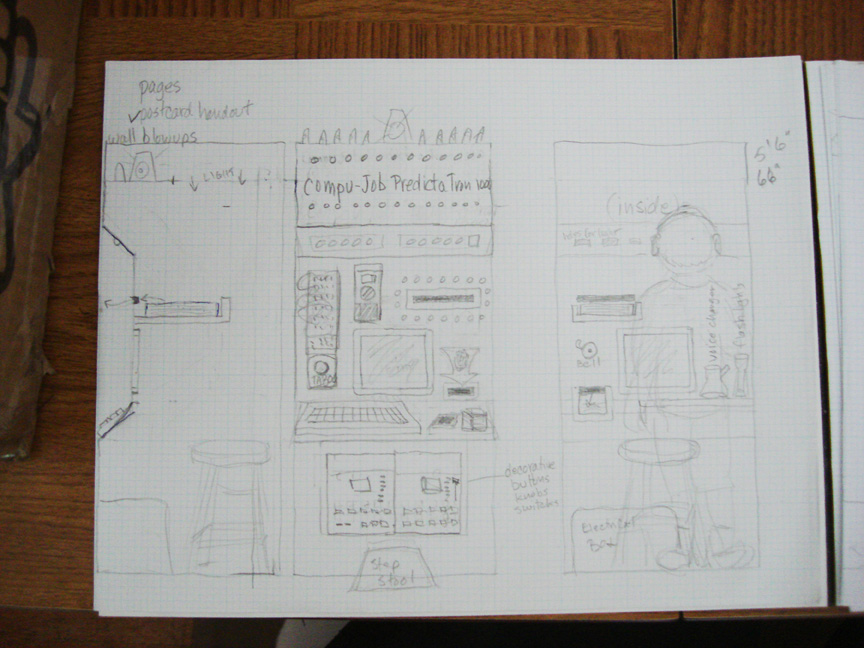
So here’s the How-To. I started with this simple sketch on my trusty graph paper. Because I possess an utter lack of mechanical or engineering skills of any kind, I had to rely on some decidedly low-tech 11-year-olds and a lot of hocus-pocus. So I based the size of the machine around the kids plus a little bit of room to maneuver.
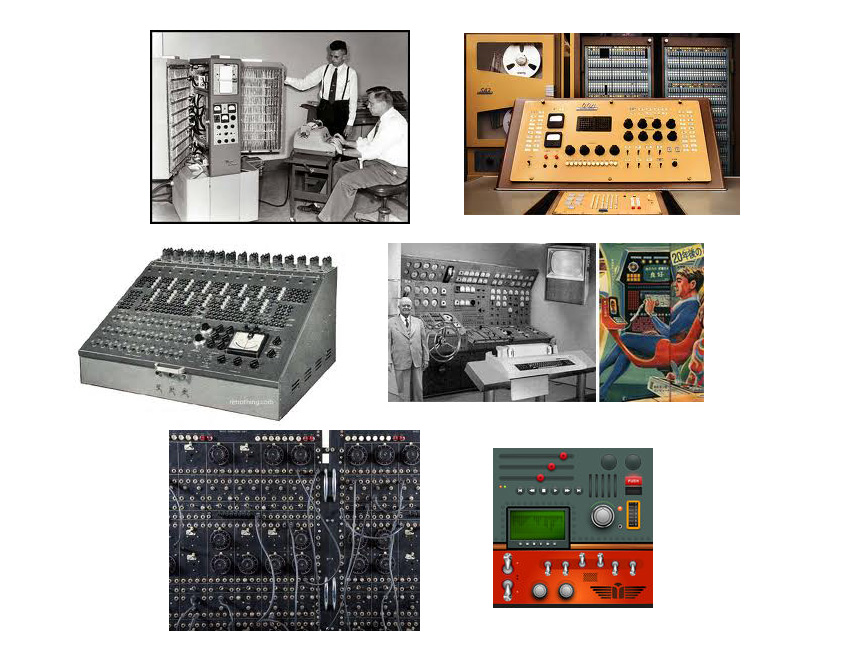
Since high-tech was out of the question, I decided to have fun with the retro-tech look, like an Eniac-machine or early vacuum-tube computers. Here are some reference photos I found quickly on a google images search, to get the flavor of what it should look like.
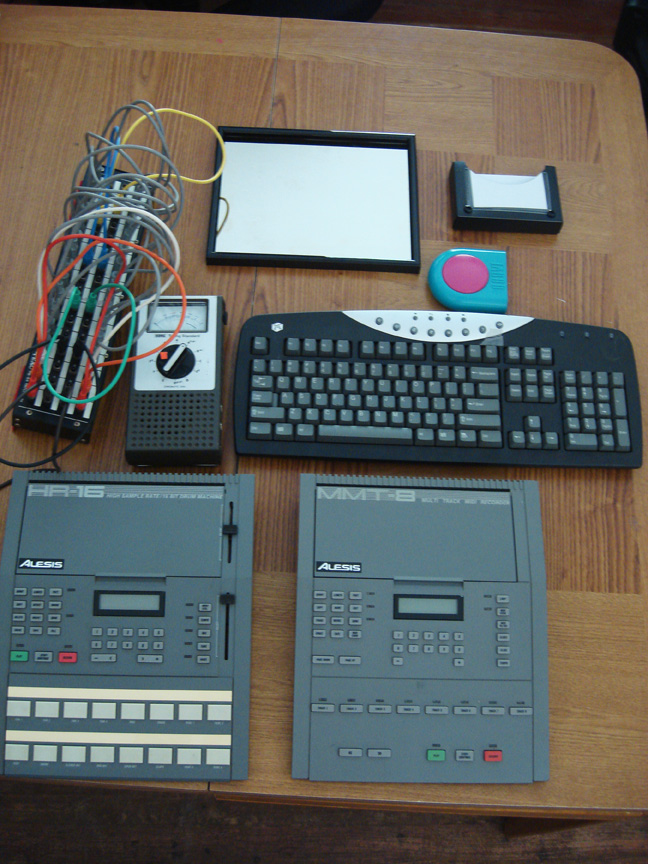
Raw Materials: The closets in my house are filled with 25 years’ worth of surprises. I discovered these beauties from my husband’s antiquated music studio. Also an old computer keyboard, a piece of two-way mirror glass cut to fit an 8 x 10 frame, a pack of 3 x 5 cards, and the buzzer from a “Taboo” game were acquired to be the “bells and whistles” of the machine. Some of these had uses, some were merely ornamental (like my husband).
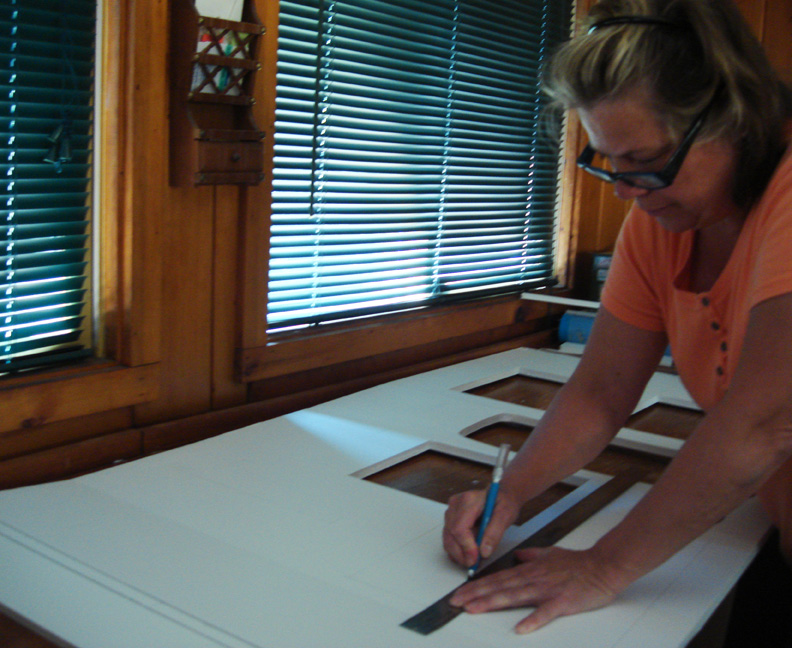
So I cut holes in the foamcore for the gadgets to be glued into.
a
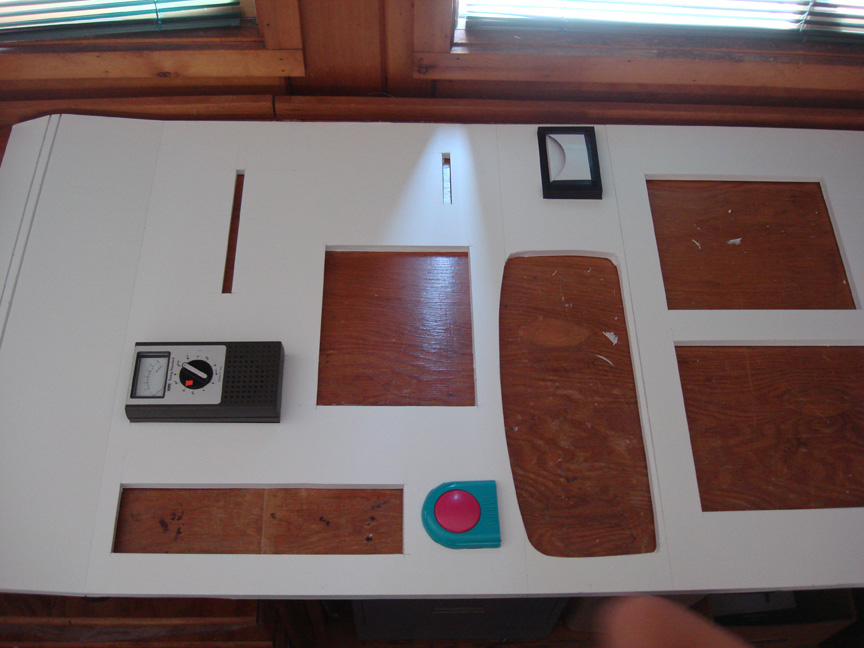
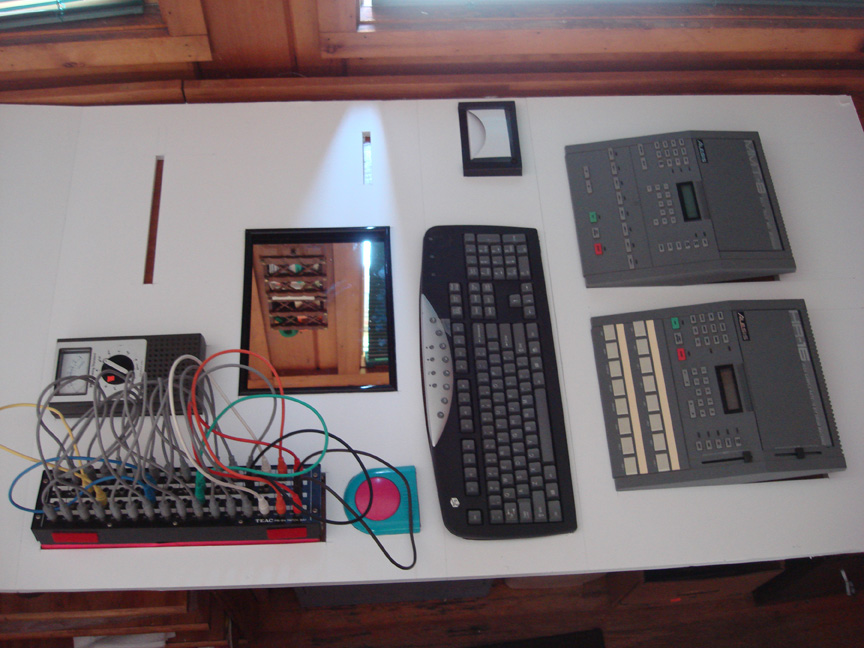
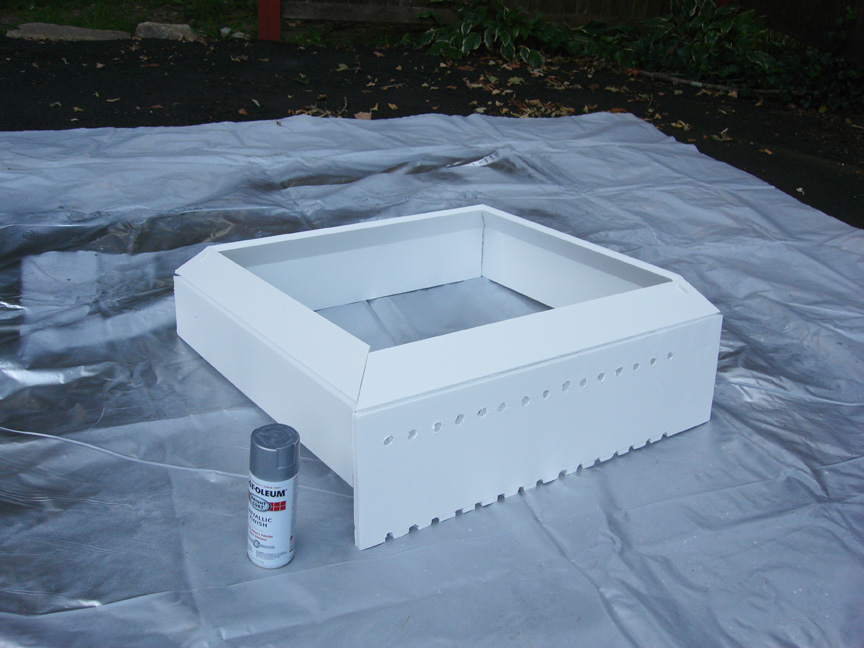
I placed the bells-and-whistles in their holes, making sure they fit snugly. But I did not hot-glue them in until after the white foamcore box was spray-painted silver.
I was concerned about the sturdiness of the structure, so I made all the sides out of double-thicknesses of half-inch foamcore. They came in 40″ x 60″ sheets, so 5-feet was as high as I could go with the main structure.
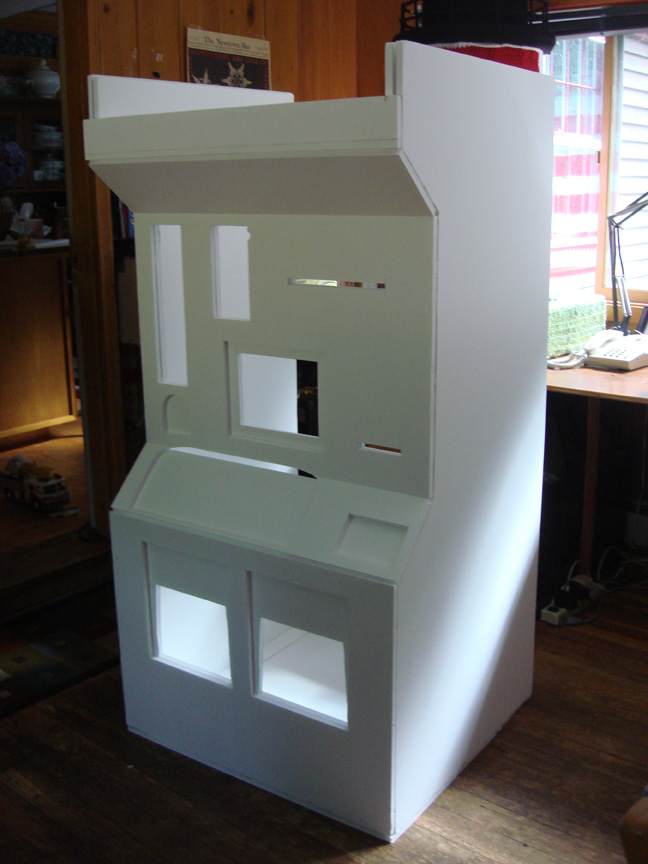
Then I made a cap piece to add on to the top. It worked out well since I ended up putting a row of lights at the seam. Notice that top of the cap is open. This was to allow for daylight and air, so the kids wouldn’t feel claustrophobic.
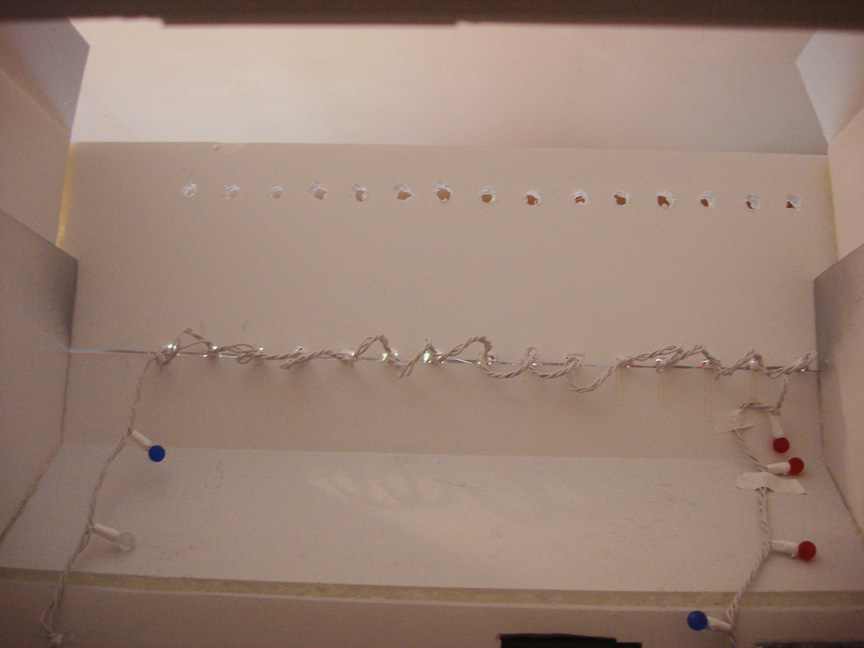
I found these Christmas lights online that were red, white and blue, and ball-shaped, so didn’t look too Christmassy. I rearranged the bulb colors to look more orderly and computery. Here’s a photo of them hot-glued to the inside. Notice the row of holes I drilled for the upper row. Turns out, a half-inch drill bit does NOT go smoothly through foamcore. It goes through easily, but leaves a ripped-up hole.
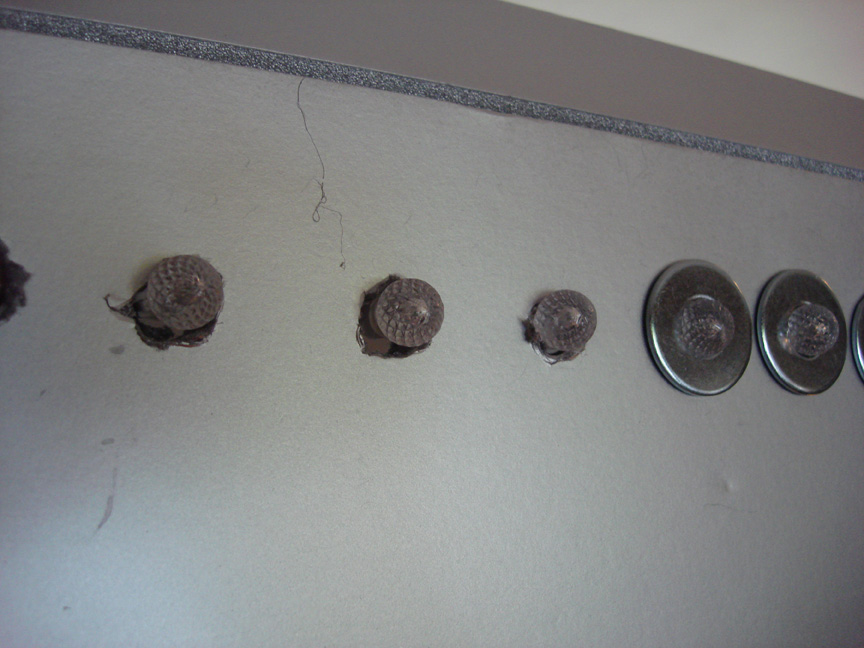
So as a repair, after gluing in the little bulbs, I got some washers from the hardware store and glued them over, as you can see on this detail below.
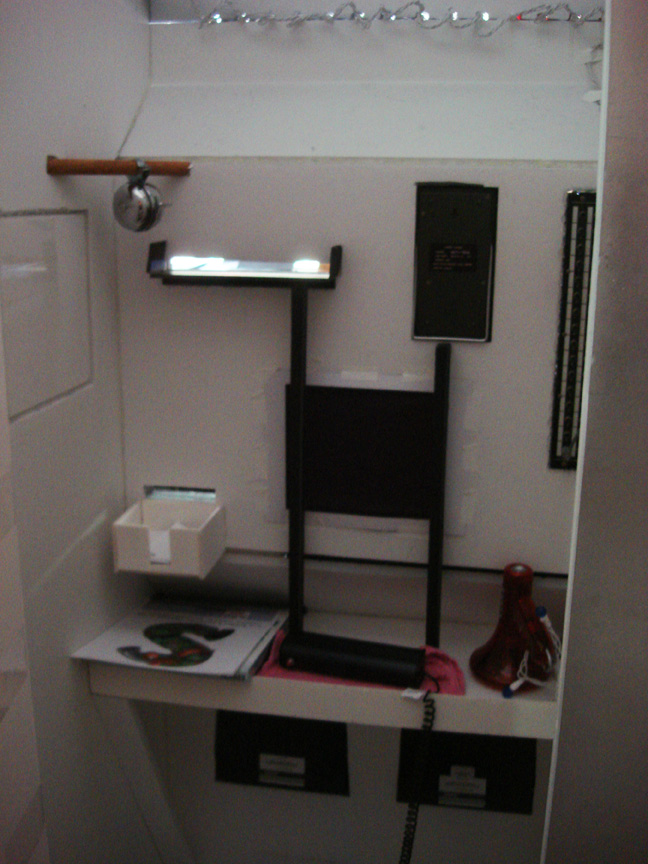
Testing out the inner workings: The “computer” talked through a toy voice-changer, saying things like “Processing Information”. The self-contained electrical system was a little generator, the “Black and Decker 400 Watt Portable Power Station with Jump Starter and Inflator”. It costs about $100 at Home Depot and is great to have around. Ours has paid for itself many times over, jump-starting our dead car batteries. This model also has a household outlet, and a car-charger outlet. The Christmas lights were plugged into the household outlet, and a set of red and blue police lights was plugged into the car-charger outlet. Rather than the white flashlight (shown below) making a “flashbulb flash”, we used the hyper-flashy red and blue police light bar to “scan” the little customer on the other side of the mirror. With any light on the interior of the box, it revealed too much “boy”, so I ended up gluing layers of sheer black fabric on the inside of the mirror. This still allowed the hyper-flashy red and blue scanning light to come through, but helped to hide moving arms and legs inside.
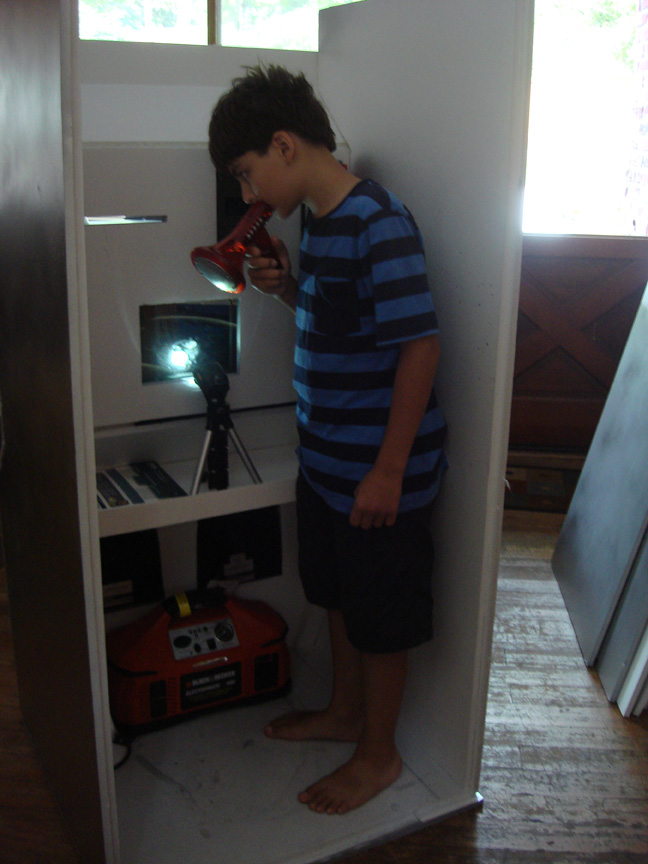
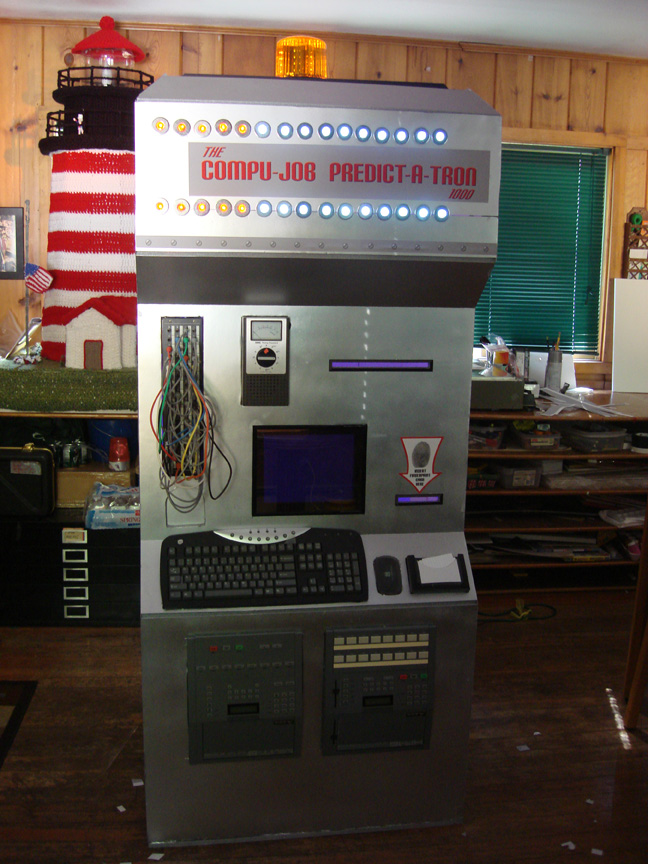
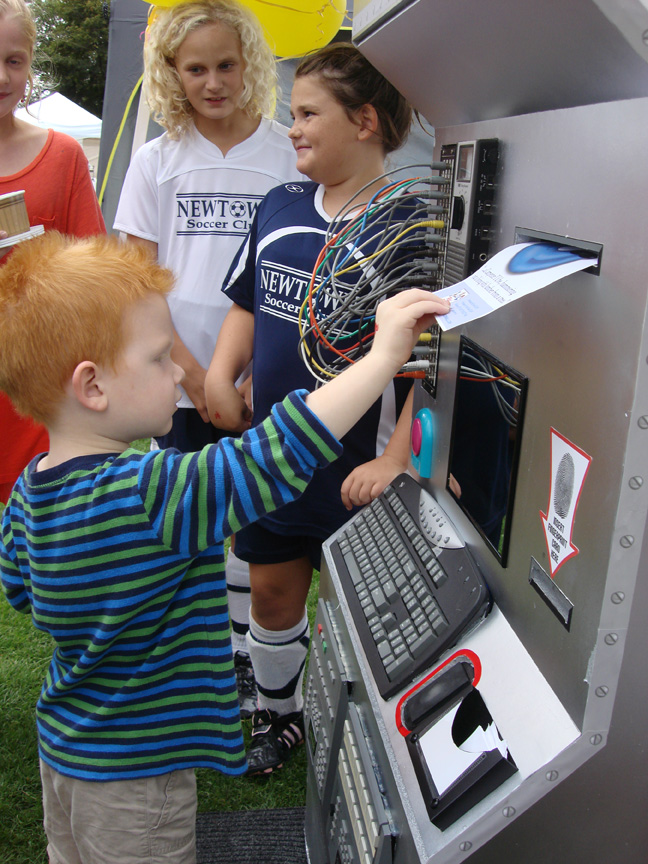
An old bicycle bell made a great “bringgg-bringgg” when the prediction sheet was output. The two vertical black bars (made of foamcore) were guides so that the hand-held “scanner bar” could be raised and lowered with a smoother motion than if it were only hand held with no guides. The little white box on the lower left was for catching the Fingerprint cards that were put through the slot. The shelf was handy for holding the Scanner light, the Voice Changer, and the stack of Prediction Sheets.
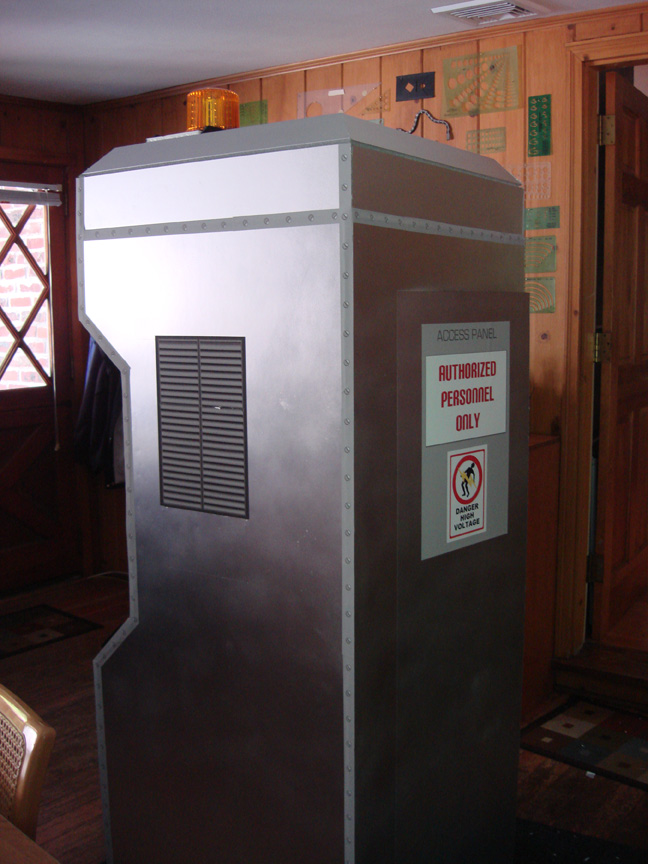
The boys made great suggestions like the “Access Panel”, the “Authorized Personnel Only” and the “Danger High Voltage” signs. See the “Air Vent” on the left? That’s a hidden arm-hole, so that I could (theoretically) run the machine by myself, say, at a book-signing event. With no boy inside, I can work the whole thing like a giant puppet.
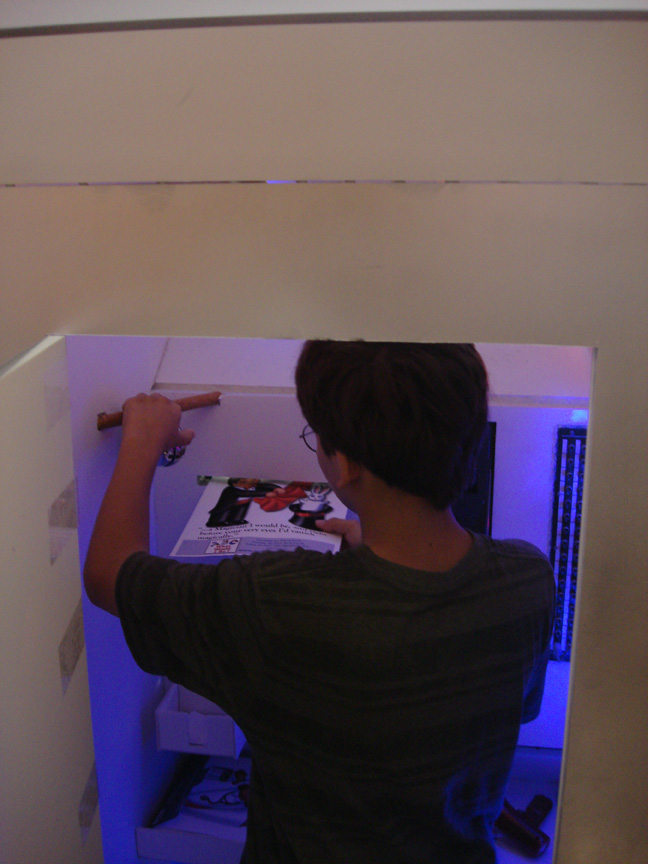
The boy rings the bicycle bell as the promised Job Prediction sheet is output.
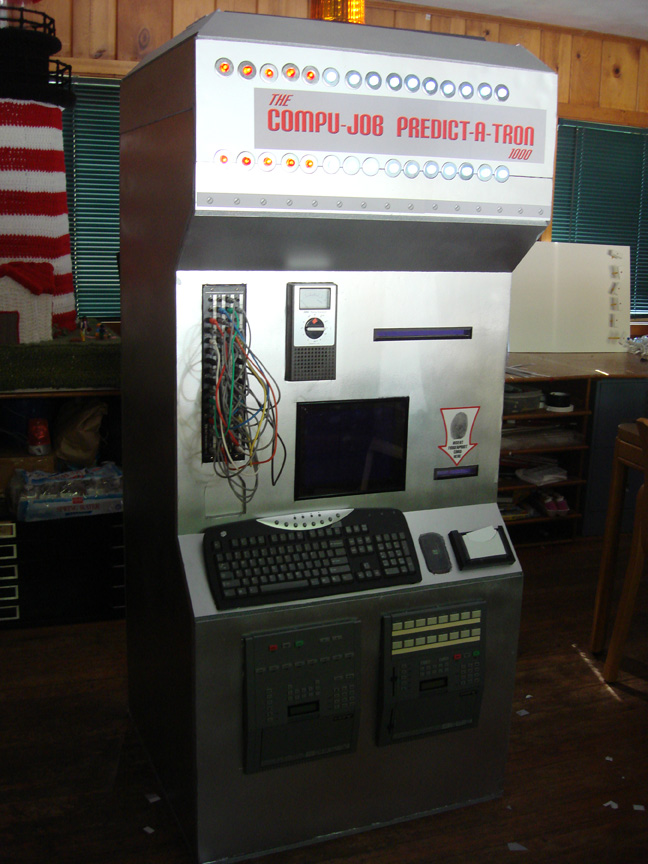
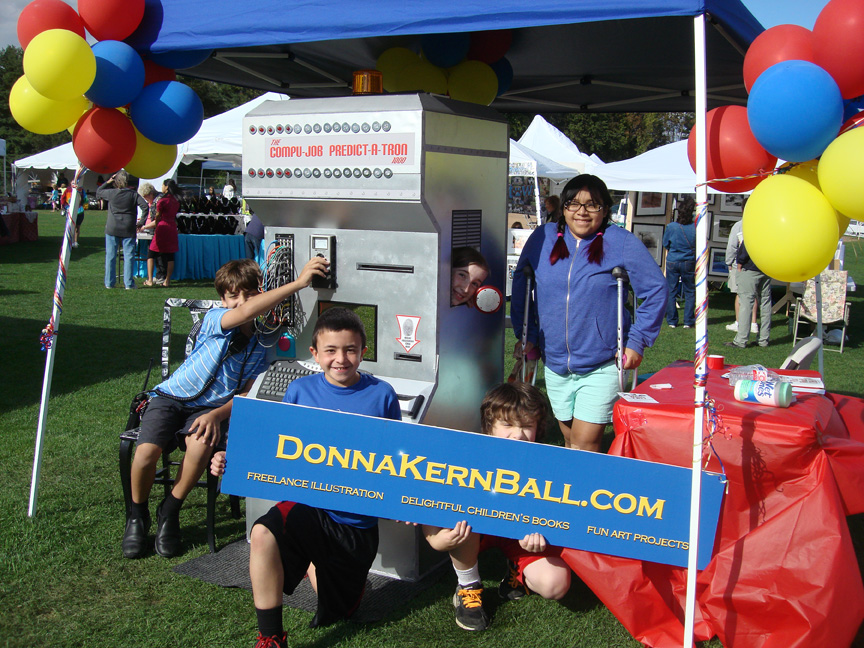
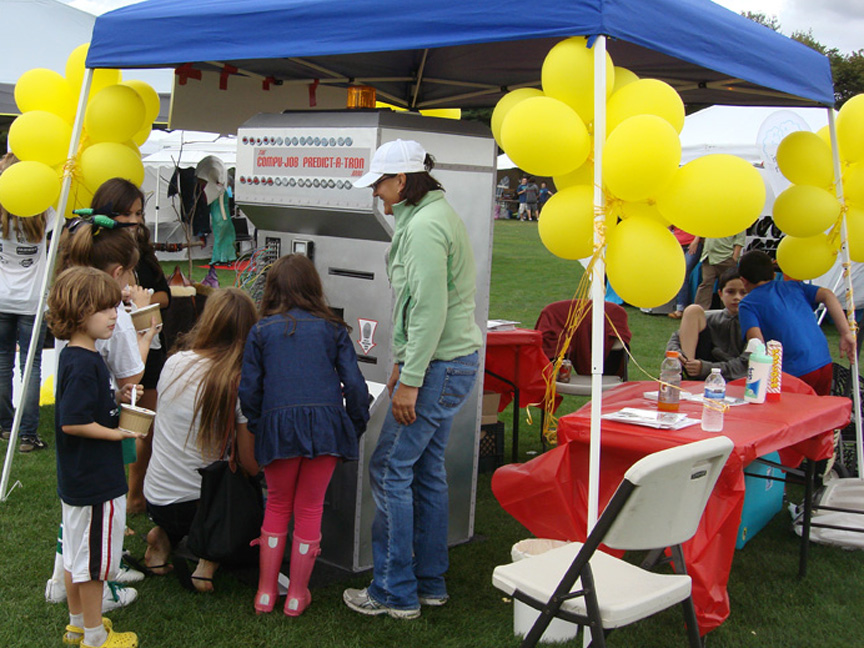
The finished computer, ready to go to the arts festival.
My team of “Technicians” at the festival.
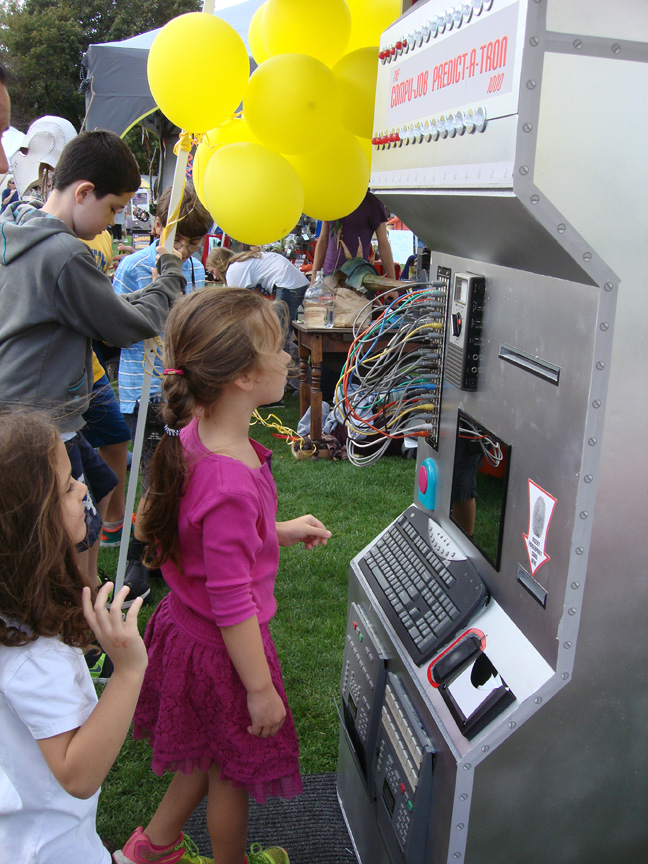
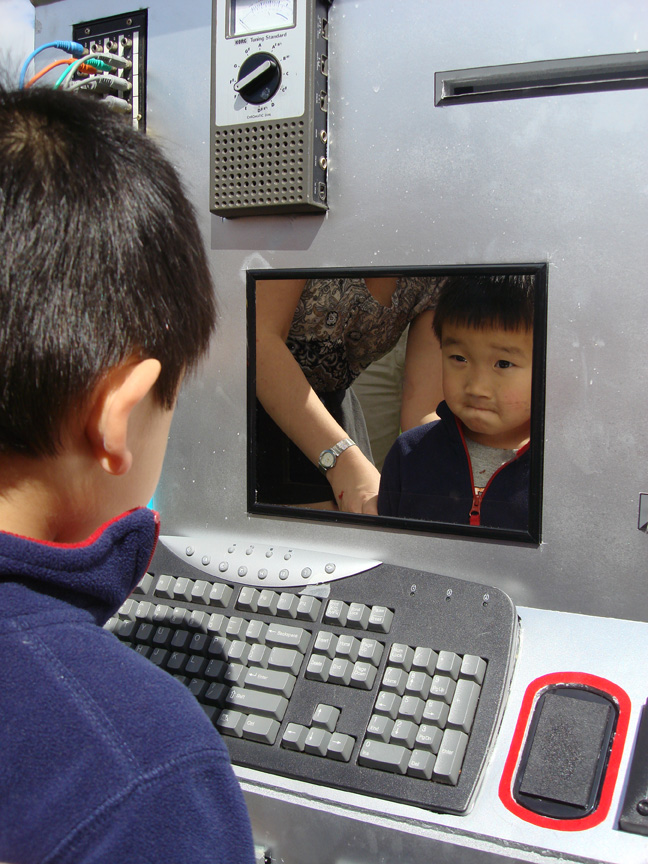
Serious faces: The “predictees” were instructed to make a serious face into the mirror as they were scanned, no smiling, because this was their future job we were talking about, and they needed to take it seriously. The results were ADORABLE, for me and the parents looking on.
We tried to keep the age of the customers to 10 and under. Here’s the sequence of instructions given to each little customer:
“Hello, would you like to know what you’re going to be when you grow up? (To the parents: It doesn’t cost anything.)
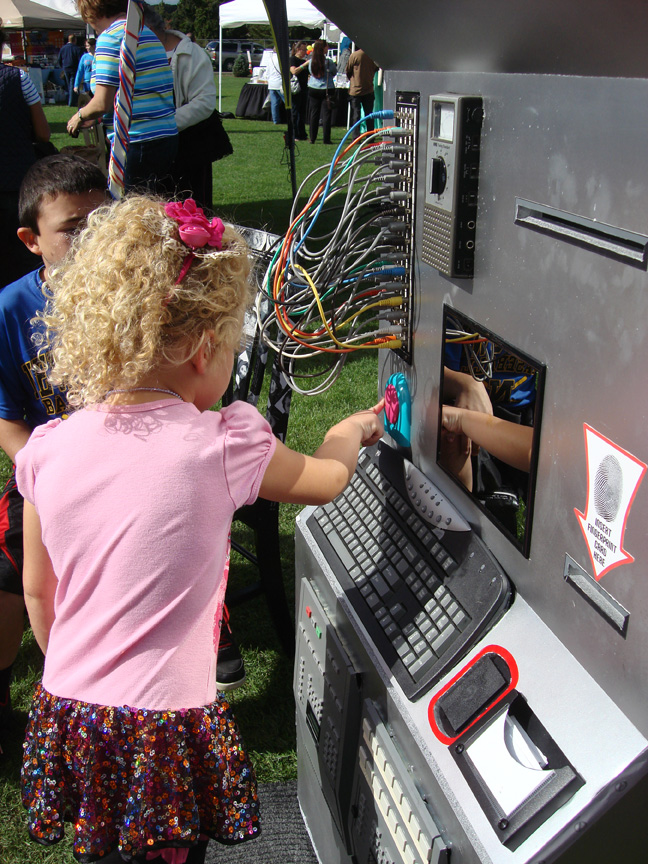
OK, first type in your first name on the keyboard, then your age on the number keypad. Of course, even toddlers can do this these days).
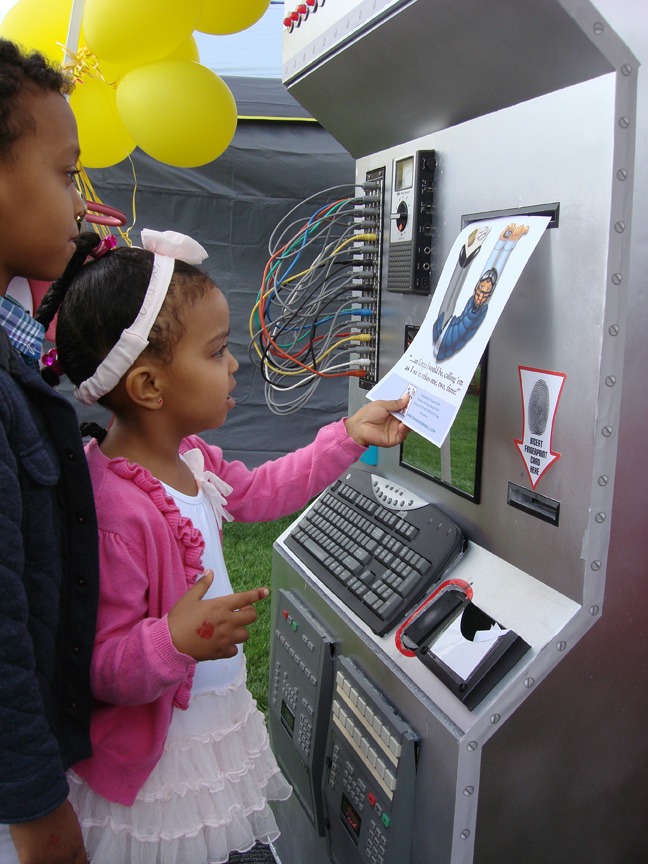
Now take an index card, press your finger onto the ink pad, and make a fingerprint on the card. Then insert the card into the Fingerprint Card slot. (We kept a box of wipees handy to wipe the water-based, non-toxic stamp-pad ink off the little fingers.)
Next, please look in the mirror and make a serious face while the computer scans you. (While the red-and-blue light flashy light bar was raised and lowered, the computer voice would make a gzshshshsh sound.)
Now turn this dial to the “D” position, thank you.
And finally, press the big pink button. (which made an annoying beeeeep.)
Then the computer would say “Processing information….” and a second later, a prediction sheet would be spit out, accompanied by the “bringgg, bringggg” of the bicycle bell. The sheets were actually pages from my book, “ABC–What Would I Be?” so they would get a nice illustration and a couplet of lines, for example: “…a Veterinarian I would be, and all the sick and injured pets in town would come to me.” A few lines at the bottom of the sheet invited parents to download a copy of the book for $2.99, and visit my website.
This little girl’s prediction is that she will be an Umpire. As I told many parents, “We make no claims about the accuracy of the predictions”. But occasionally the Compu-Job would hit it right and the customer and the parents couldn’t BELIEVE this fantastic machine–how could it have known?!?! Anyway it came out, the kids were intrigued at the “official” suggestion, and who knows what idea it might have inspired…..Every job, as the book says, will try to make the world a better place to be.”
We had a steady stream of customers at our booth, and gave out a total of 240 predictions!!
Was it Worth It? It took about a month to build, and I spent about $200 on foam core, lights and other odds and ends. I spent about the same on ink and paper, to print out 250 prediction sheets. It was a terrific end-of-summer project for the kids to be involved with, and they LOVED running the machine at the festival! The bottom line proof of success would be how many people went home and downloaded or purchased the book?? I don’t know the answer to that. But not every success is measured by the bottom line.